3 Creative Craft Room Storage Ideas – One Room Challenge {week 6}
In this post: creative craft room storage ideas (or home office ideas) that you can DIY on a budget.
![]()
Creative Craft Room Storage Ideas
Welcome to week 6 of my One Room Challenge! If you missed anything, you can see the previous posts here…
Week 1 | Week 2 | Week 3 | Week 4 | Week 5
A little house in small-town Oklahoma survived the Dust Bowl years, the Great Depression, and decades of life. For part of its time, it sheltered a loving family with seven children. The oldest daughter in that family was my maternal grandmother.
Many years later, my grandmother and her siblings went back to the home, now abandoned, and discovered that some of the home’s original window frames had been left in the garage. The frames became a sort of souvenir from their old home.
Years after that, I somehow ended up with one. Everyone in my family knows that I have a great love for old, chippy furniture and things, so I often get offered vintage and antique items. Yay!
I’ve always wanted to use this old window frame for something, but have never found just the right place for it…..until now.
Creative craft room storage idea #1
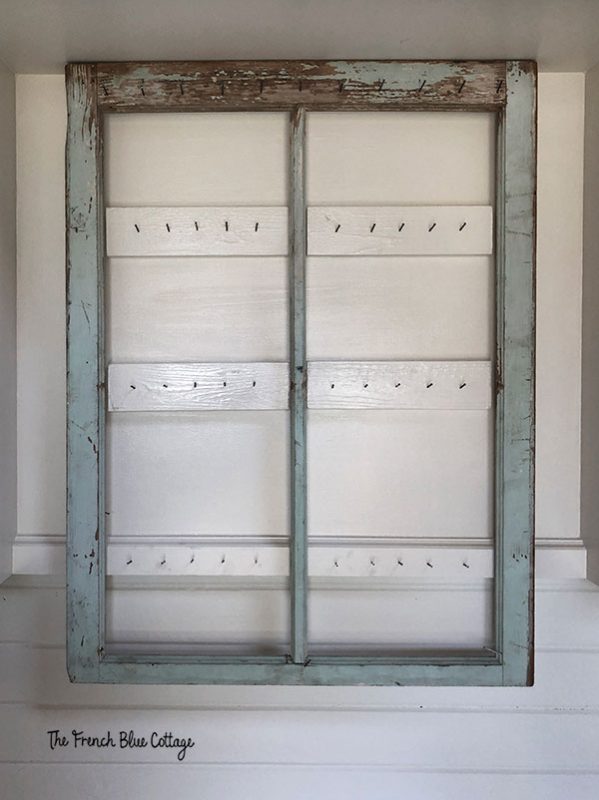
I decided to store and display my oil paints on this old, chippy window frame.
First, because there is a trim piece on the wall, it caused the window frame to stand off of the wall about 3/4 of an inch. To account for this, we added strips of wood at the top and in the center and then attached the frame.
Then, we hammered in a line of nails along the top of the window and on the center pieces.
Affiliate links used below. See full disclosure here.
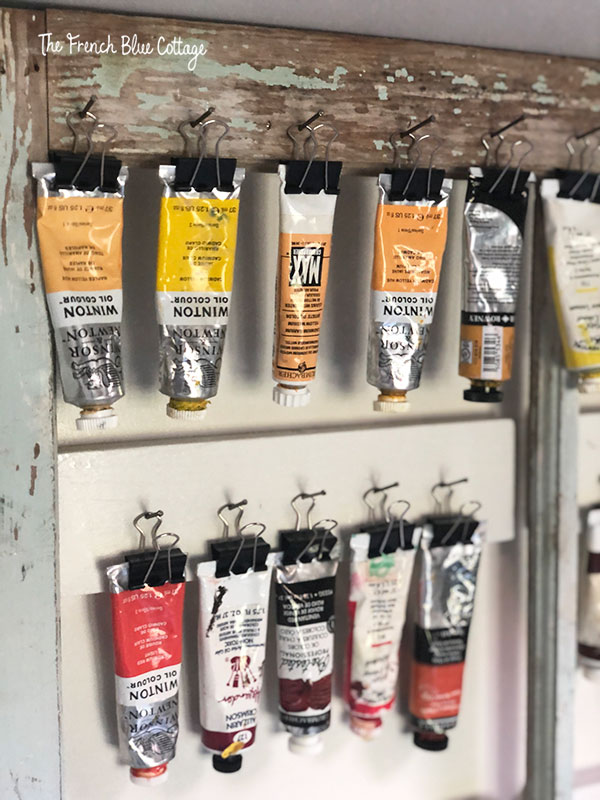
Then, I simply attached a binder clip to the end of one of my paint tubes and hung it up on a nail….

I quickly filled up the rest of the nails with more tubes of paint.
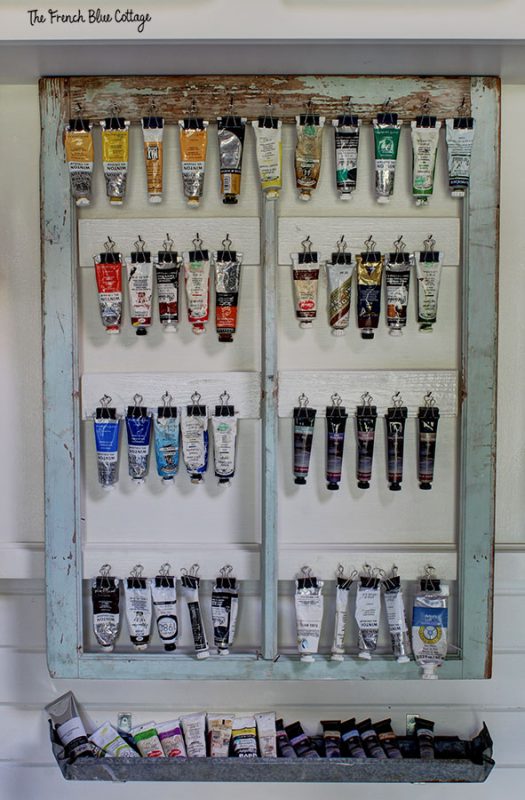
I love the original, chippy paint on this window frame! As I sit and paint, this sentimental piece of my grandmother’s childhood is in full view.
This method of displaying my oil paints is meaningful to me, very functional, and was done on a budget.
To store a few more colors, I used an old chicken feeder tray that is attached to the wall with simple L-brackets…..
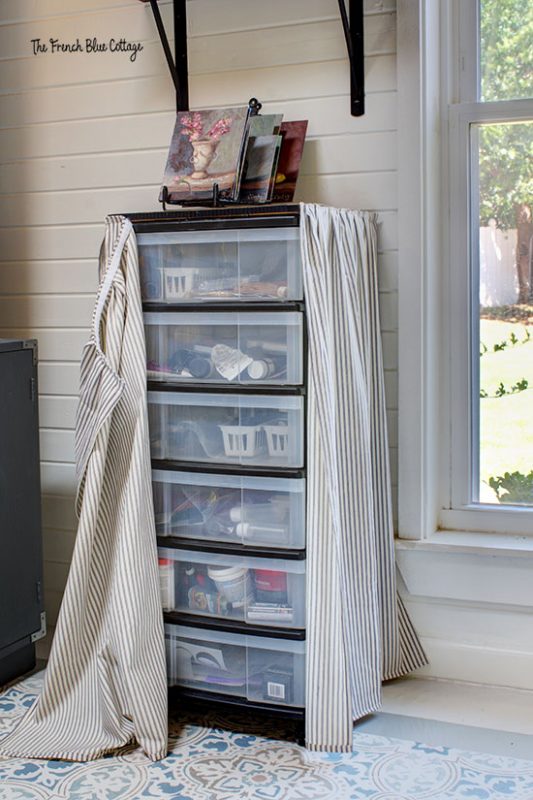
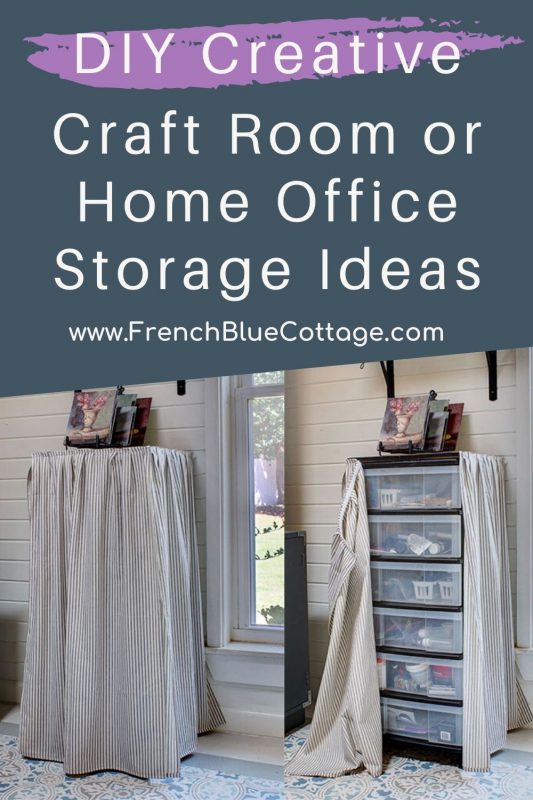
Not only do I have oil paints to store and display, I also have many acrylic paints, adhesives, gold leaf supplies, et cetera that I need to keep organized. Before this makeover, I kept all of these things in a rolling plastic drawer tower and it really worked well for me.
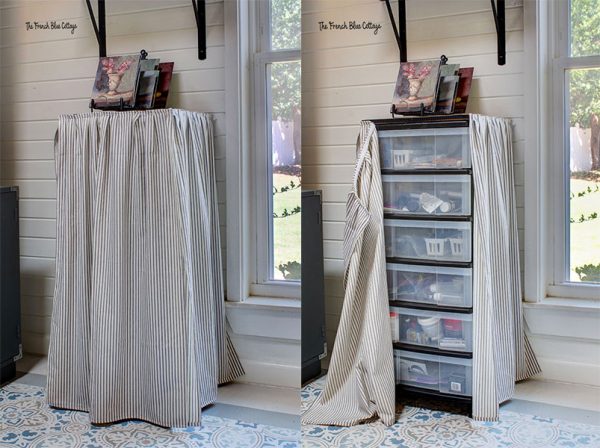
Unfortunately, these plastic drawers are not really attractive. So, similar to what one might do with an ugly chair, I decided to give it a slipcover!
Creative craft room storage idea #2
First, my husband cut a square of 3/4 inch pine to fit on top of the storage cart. It hangs over about 1/4 inch on the two sides and the back, but is flush on the front. Then, I gave it a quick sand and a coat of water-based stain. We did not attach it to the cart in any way; it’s just resting on the top.
Next, I cut out three pieces of blue and white ticking fabric and hemmed the top and bottom of each. I made them wide enough to be able to gather and sew them with a slight ruffle on the tops.
For the back and the two sides, I simply hot glued the fabric to the pine board.
For the front, I used sticky-back velcro on the board and sew-on velcro on the fabric.
When I need to get into a drawer, I simply peel back the velcro…..
And then I can close it back up and not have to look at the plastic or the mess inside…

Plus, the top is nice and even now. I am using it to dry my paintings.
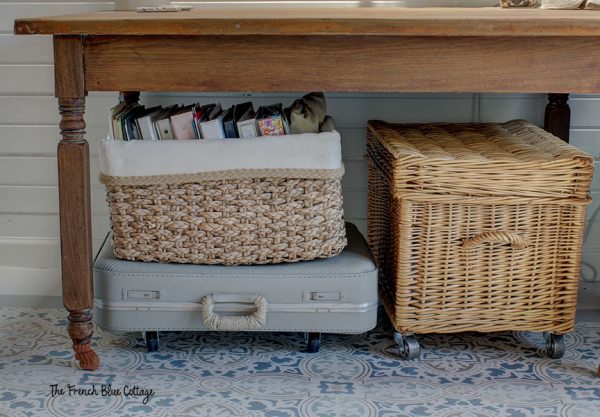
Creative craft room storage idea #3
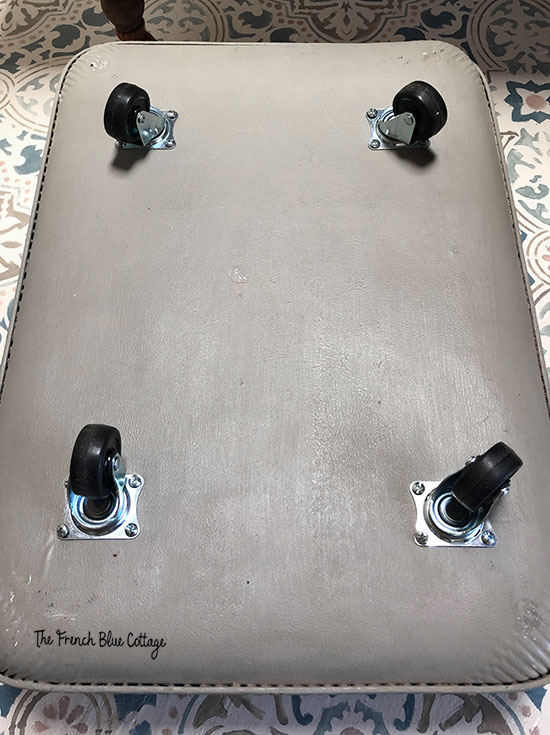
For my last storage idea, I used a vintage suitcase to store some office supplies and paperwork. I need these things occasionally, but not often enough to warrant taking up precious space in a drawer of its own.
At first, I stuck some adhesive felt pads to the bottom of the suitcase to keep it from scratching my painted floor. But then I really wanted to add another basket on top of the case so that I could keep some of my binders inside. I knew that this would add quite a bit of weight and would make it more difficult to slide the luggage out.
The solution…..these casters!
(You might have seen me use these casters for the rolling bins in my pantry makeover. I really like them!)
We put a small square of wood on the inside of each corner and screwed the casters through the bottom of the suitcase and into the wood.
Voilà!
DIY rolling storage….
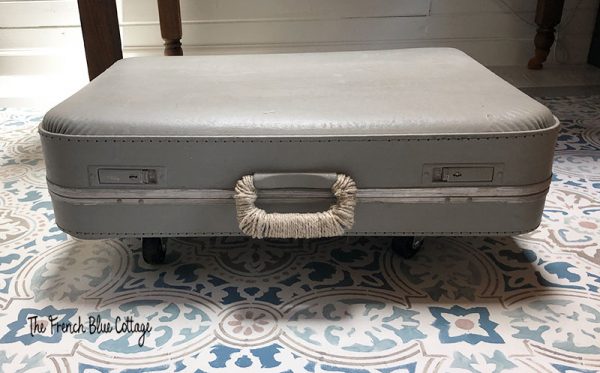
And it is sturdy enough to store another basket on top for more storage and organization…
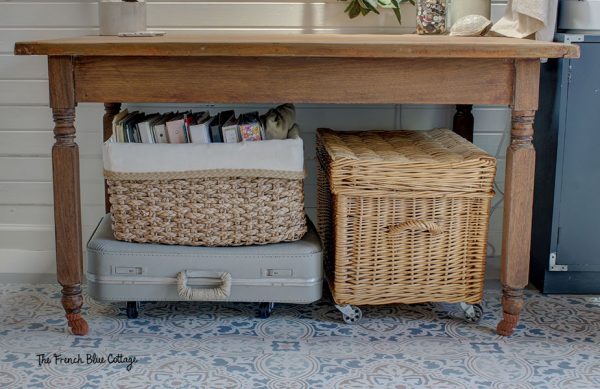
Did you notice the “socks” on my table? ?
I love original casters on furniture, but sometimes they have harsh edges that can damage floors. I really did not want to take this chance with my new painted and stenciled floors, so I covered the casters with these sock-style floor protectors. They work great and blend in quite well with the color of the table.
Art and Crafting Studio To-do List:
paint walls and (possibly) ceiling (decided against painting the ceiling)paint colorful, stenciled concrete floorre-paint desk areaaddress lighting and ceiling fan (give it a DIY makeover!)order window shade(install shade)find and buy a pine table(refinishing pine table)figure out storage needs, buy baskets that fit, & then organize- buy office chair (I’ve decided to recover one I already have)
decide on a rug (I love the floor so much, that I’m not adding a rug!)- make art ledges
- make open shelves
get new cabinet hardwarecover plastic storage drawersfigure out oil paint storage- decor items
Remember, you can take a look at the other participants’ rooms here!

We’re in the home stretch now…only two weeks to go!


Okay I am in love with you paint storage that is just brillant! It is crafty and useful at the same time.
Thank you, Jen! I saw something similar on Pinterest and put my own spin on it. It’s been very helpful!
What great organization ideas! I love that you were able to come up with a use for the window frame from your grandmother’s house. Your paints hanging from binder clips make an interesting display that is functional but also looks great. I’ve never thought about putting wheels on an old suitcase . Your idea would make it easy to use a suitcase under a bed for extra storage. (My 1950s house has tiny closets and I’m always looking for storage ideas.)
Thank you, Paula! I’m always on the lookout for good ideas for organization, too. I saw a similar paint display on Pinterest and gave it my own spin. Also, I hadn’t thought of using the suitcase with wheels under the bed. Now you’ve got me wondering if it would fit under mine because I have a couple more of those vintage cases!
Those are some creative ways to store your supplies. I love that they are unique and beautiful. Old windows are always a fun thing to use for storage solutions.
Thank you:) It took me a long time to figure out what to do with that window frame!
Great storage idea, Carrie… and I love the skirt! Pinned!
Thanks, Julie!
Love all these creative storage ideas Carrie, but I especially like the way you repurposed that window frame! So clever!
Thanks, Denise! I’ve been painting in here already and it works great for me!
These are brilliant ideas to creatively and beautifully organize!
Thank you, Tina!!
Carrie, I love the story about your grandmother’s window frame. With that fabulous chippy paint, it makes the perfect display for your paints! I just love how your craft room is coming together. It looks like you’re having a lot of fun with this project! Pinned 🙂
Thank you, Rebecca! I am having fun with this renovation:) This room is going to get a lot of good use!
Those are such GREAT ideas for storage that look amazing, too!!
Thank you, Rita!!
It’s been so fun following along this space !
Thank you, Jenna! I sure appreciate you for following along as I tackle all these projects:)