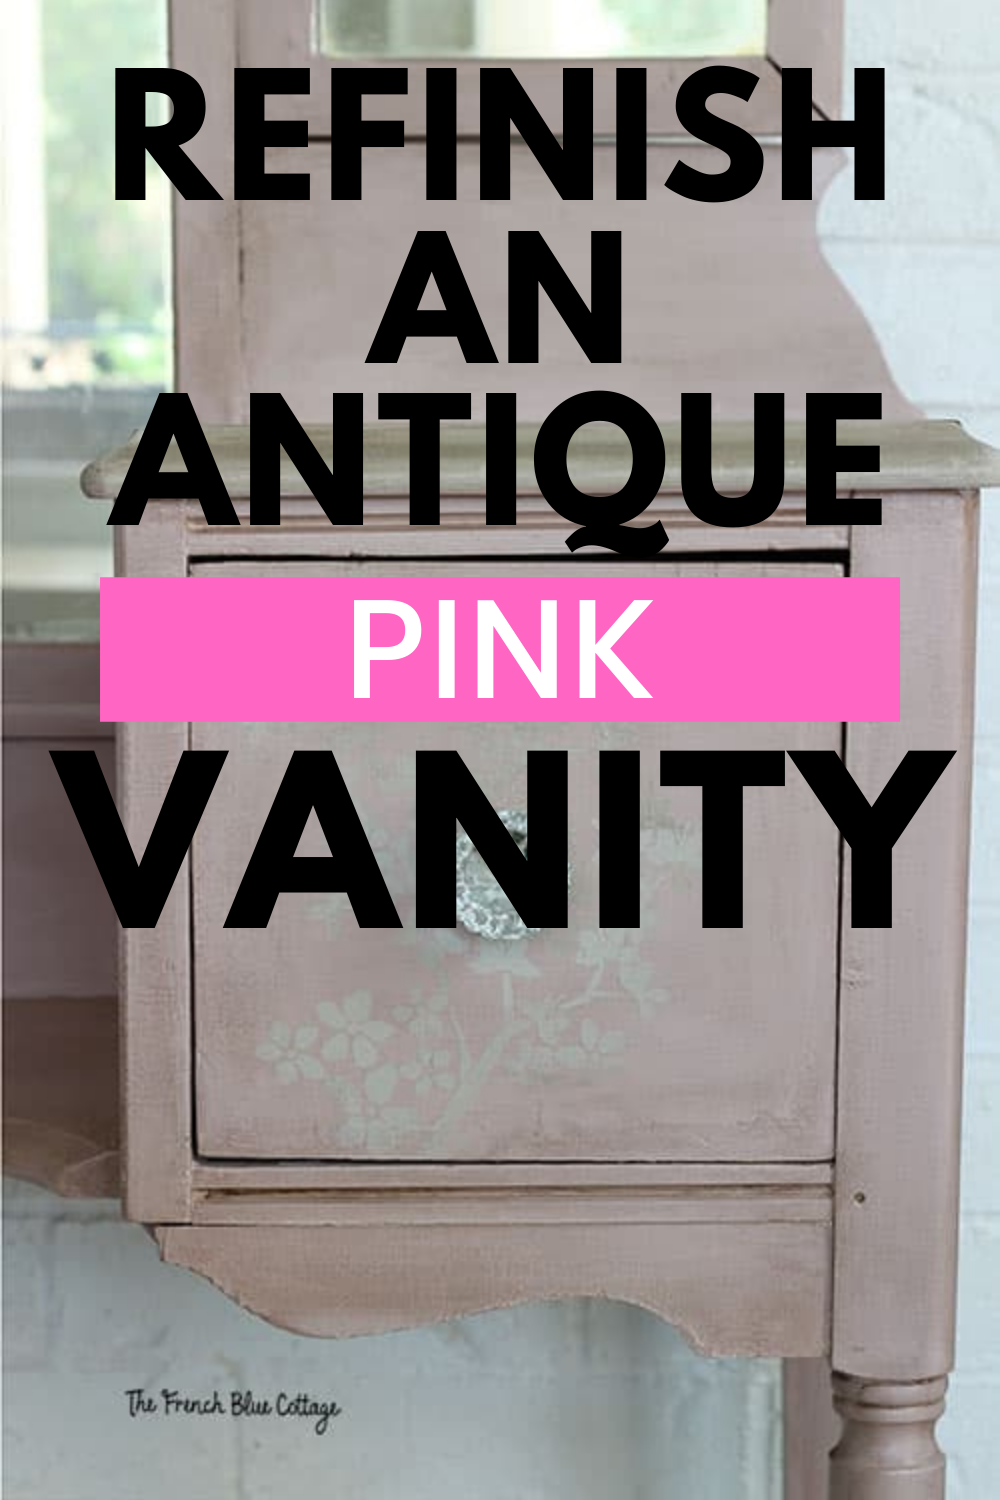
A Pink Antique Vanity
In this post: I repaired the veneer and then painted, glazed, and stenciled a pink antique vanity.

When refinishing furniture, there are good deals, there are really good deals, and (best of all) there are the ones that are FREE! And that’s what this little antique makeup vanity was for me.
My sister-in-law did not have a place for this piece and, knowing that painting and rehabbing furniture is one of my “things”, she gave it to me. You can see some of my other painted furniture pieces here.
Some affiliate links are used in this post. You can see my full disclosure here.
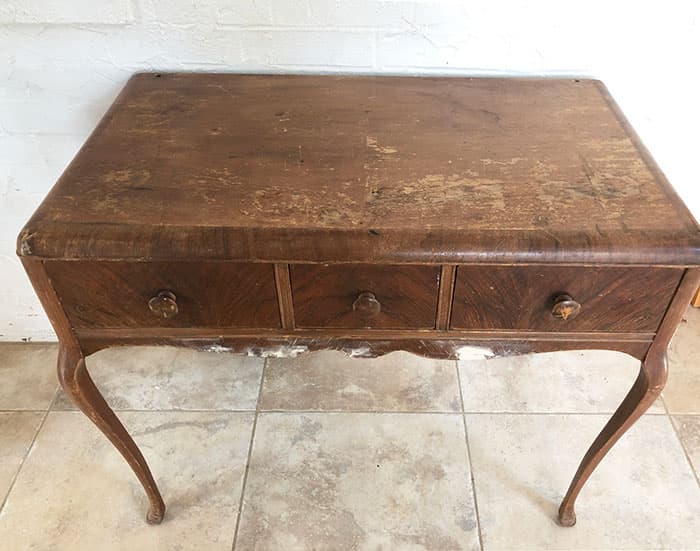
Here’s how the pink antique vanity started out…
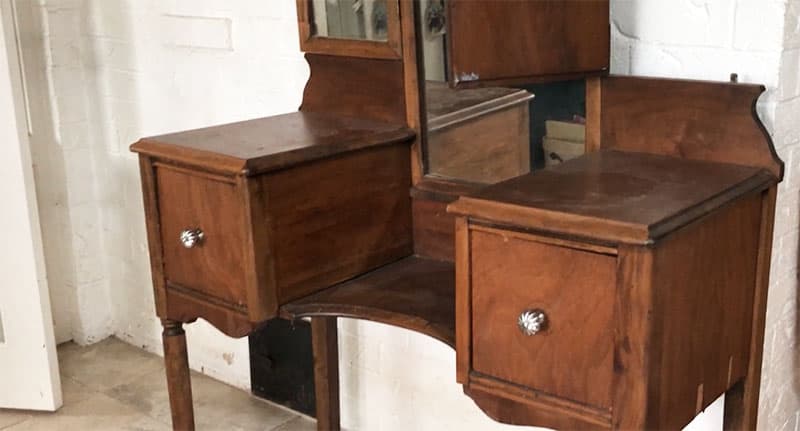
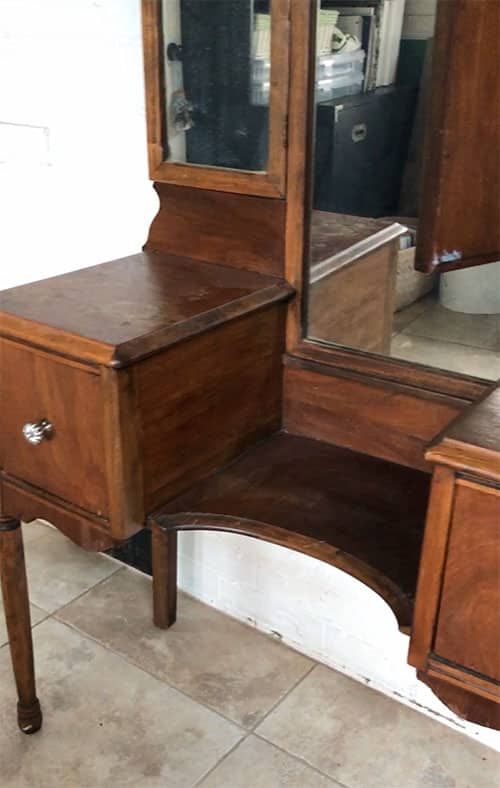
I know these are not the greatest before photos! I forgot to take regular before photos and ended up having to do a couple of screen grabs from a video. ?♀️
Some people probably prefer to leave stained wood unpainted, but even if you are in that camp, there are pieces that are damaged and not really worth the time or cost to have professionally repaired. Actually, the only times I would ever consider having a piece professionally re-done is if it was a very expensive antique (of which I do not own) or an extremely sentimental piece.
Anyhow, this vanity had a problem that is very common in older furniture….peeling veneer.
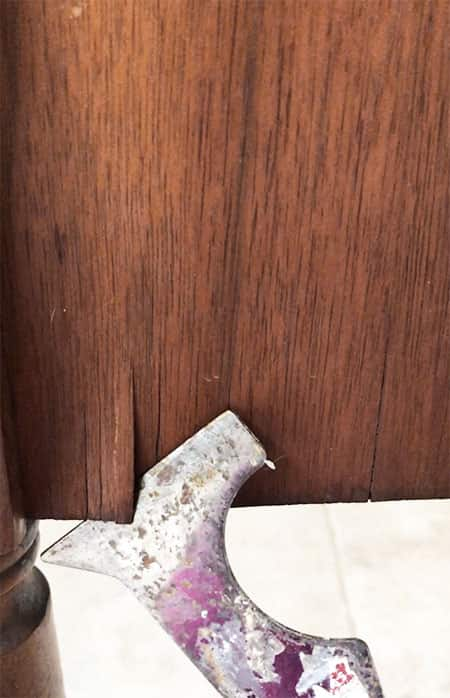
There are a few ways to repair veneer. This is the method I used to fix the peeling veneer on this vanity and to refinish it….

Remove the loose veneer
Use something sharp, such as a 5-in-1 tool to remove any loose bits of veneer. Don’t get carried away and try to scrape it all off, just remove the parts that are already coming off. My goal was to leave as much on as possible!

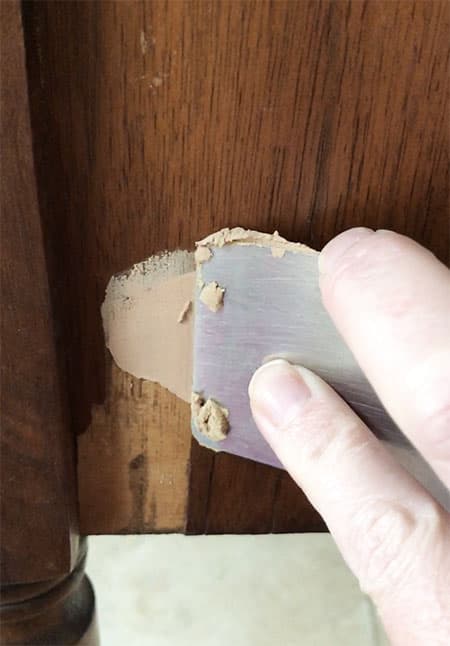
Repair with wood filler
Next, I applied wood filler to the areas that I removed and spread it until was slightly overfilled and allowed it to dry.
Then I sanded it until it was flush with the surrounding areas. Once they’re dry and sanded, you can run your hand over the areas to check if you need more sanding or another layer of wood filler.

Prime and paint the vanity
A lot of chalk paint brands say that you don’t need to prime before you use them because they will stick to most surfaces. However, priming is about more than just helping paint adhere. Sometimes you need primer to prevent bleed through. Because this vanity had a red stained finish, probably cherry, and because it’s old, I chose to prime first. I usually use this primer (which is what I used on this piece) or this primer.
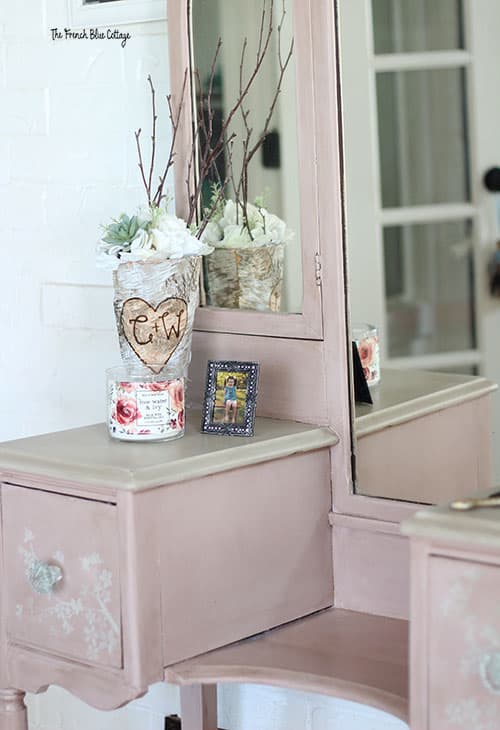
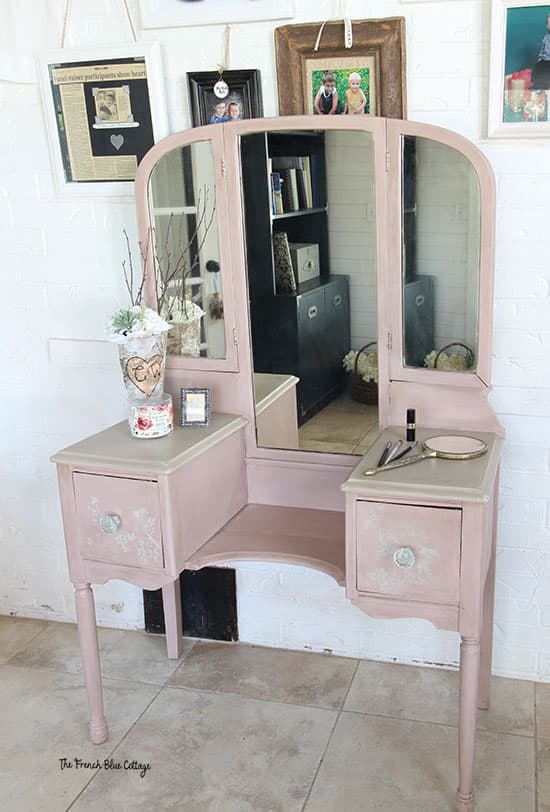
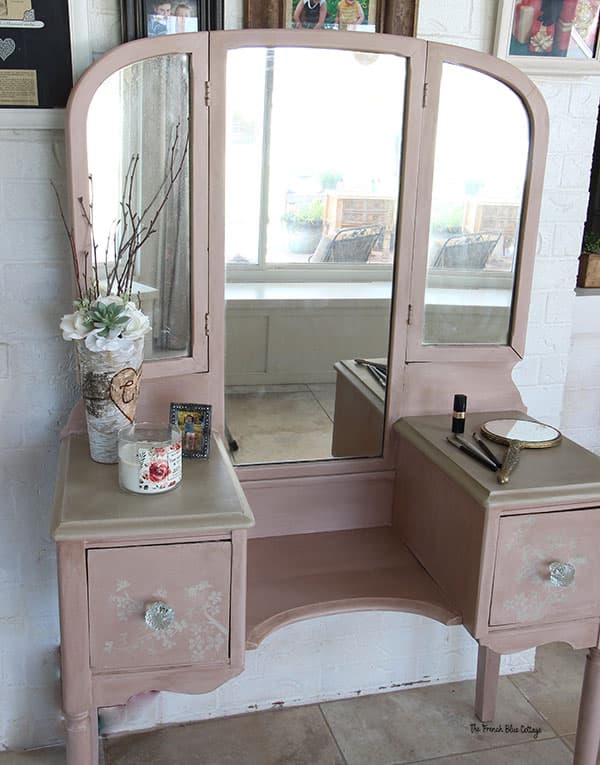
Then, I painted the whole piece with Dixie Belle chalk paint in the color Tea Rose.
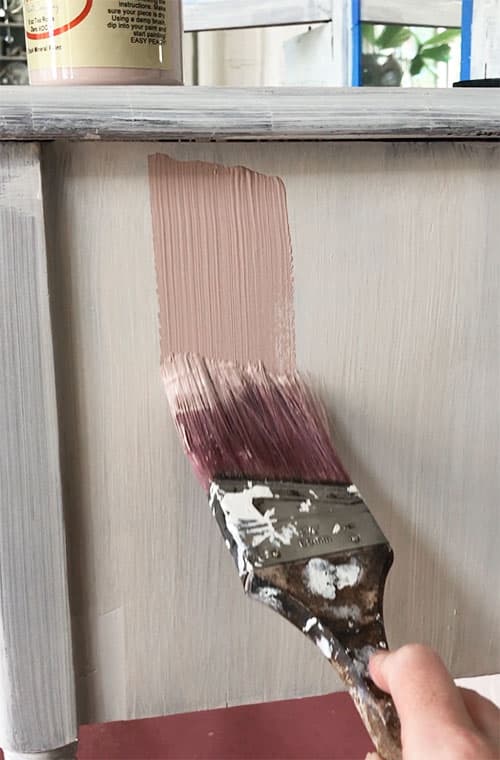
After the first coat dried, I decided to apply a second coat. But this time I brushed on the paint in the opposite direction, which makes a subtle cross-hatch pattern in the finish.
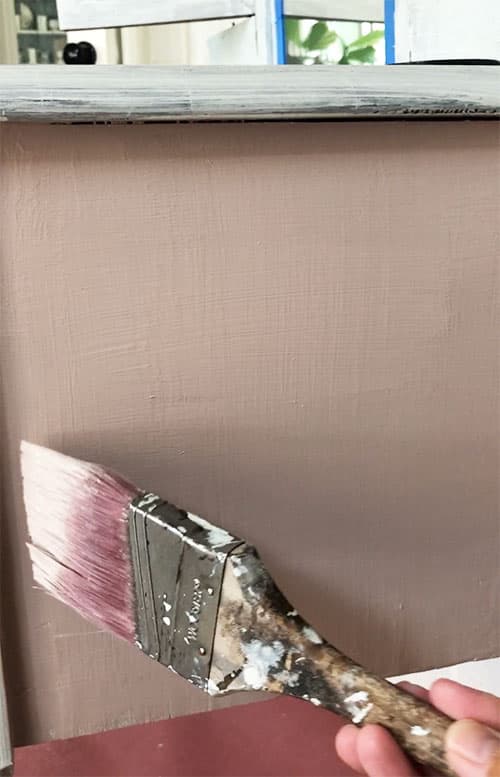
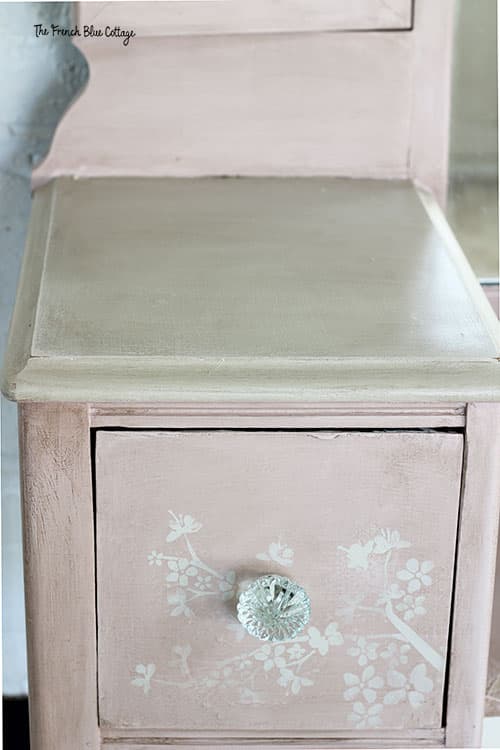
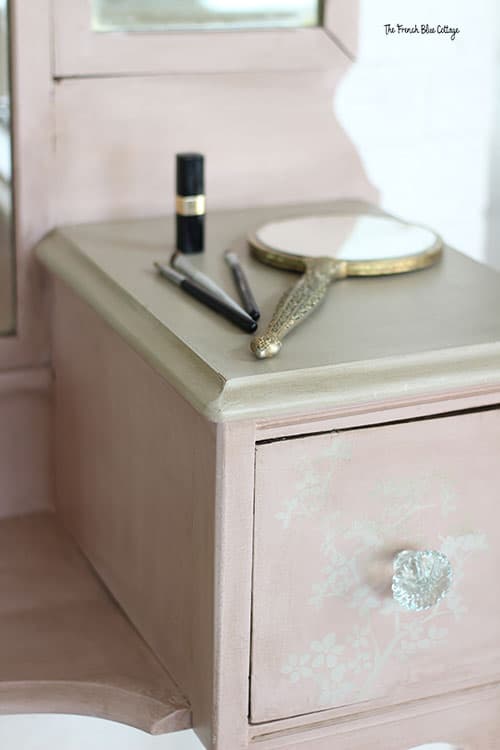
After I painted the entire dressing table, I decided that it was just too much pink. So, I used another Dixie Belle color, called Sandbar, to paint the tabletop parts.

Seal and glaze the vanity
After the paint dried, I sealed the whole thing with a water-based sealer (I used Varnish Plus Satin by Faux Effects).
After the sealer dried, I gave it a coat of an antiquing glaze to tone down the pink and give it a bit of an aged appearance.
I used more Faux Effects products for the glazing, too.
As a side note, these are the products I was trained to use in my faux finishing classes. I love them, but they are not as readily available as some other products. Eventually, I’d like to try out some other products so that I can pass the information along to you.

Add a stenciled detail
The vanity looked really pretty at this point. But I decided to add one more detail….a stencil on the drawers.
I found a small cherry blossom stencil in my crafting stash and used the Sandbar paint that I used on the tabletop to add a stenciled pattern to the drawers.
Lastly, I changed out the silver knobs for some clear glass ones.
The finished pink antique vanity:
Then, I had a little fun dressing up the dressing table:)
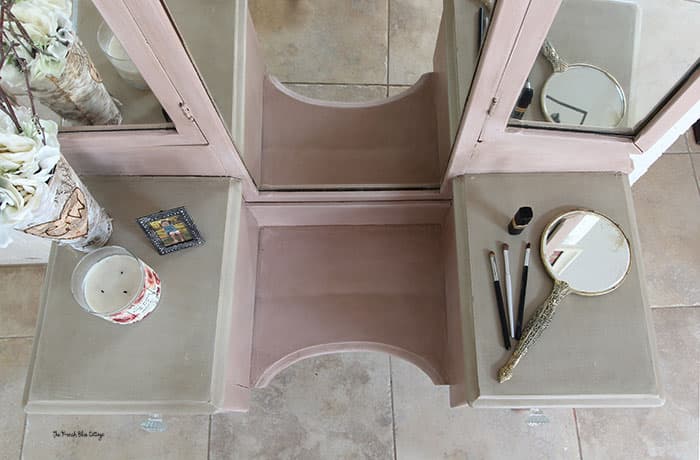
Let me just tell you that taking photographs of a vanity with three mirrors is not an easy task! Something was always reflecting in one of the mirrors….the messy bookshelf, wet towels hanging outside the window, or me and my tripod!
These angled shots were the best I could do…
I’m really happy with how this little (free) cutie turned out!
And guess what?
My sweet sister-in-law actually gifted me with two pieces of furniture.
So, next up is this pretty writing desk….
Have a wonderful weekend!

Wow!! That is stunning!! I love the contrasting colors and adding the stencil and the glass knobs made this vanity a real beauty!!
Thank you! It think it would be perfect for a younger girl’s room or a shabby chic style bedroom now:)