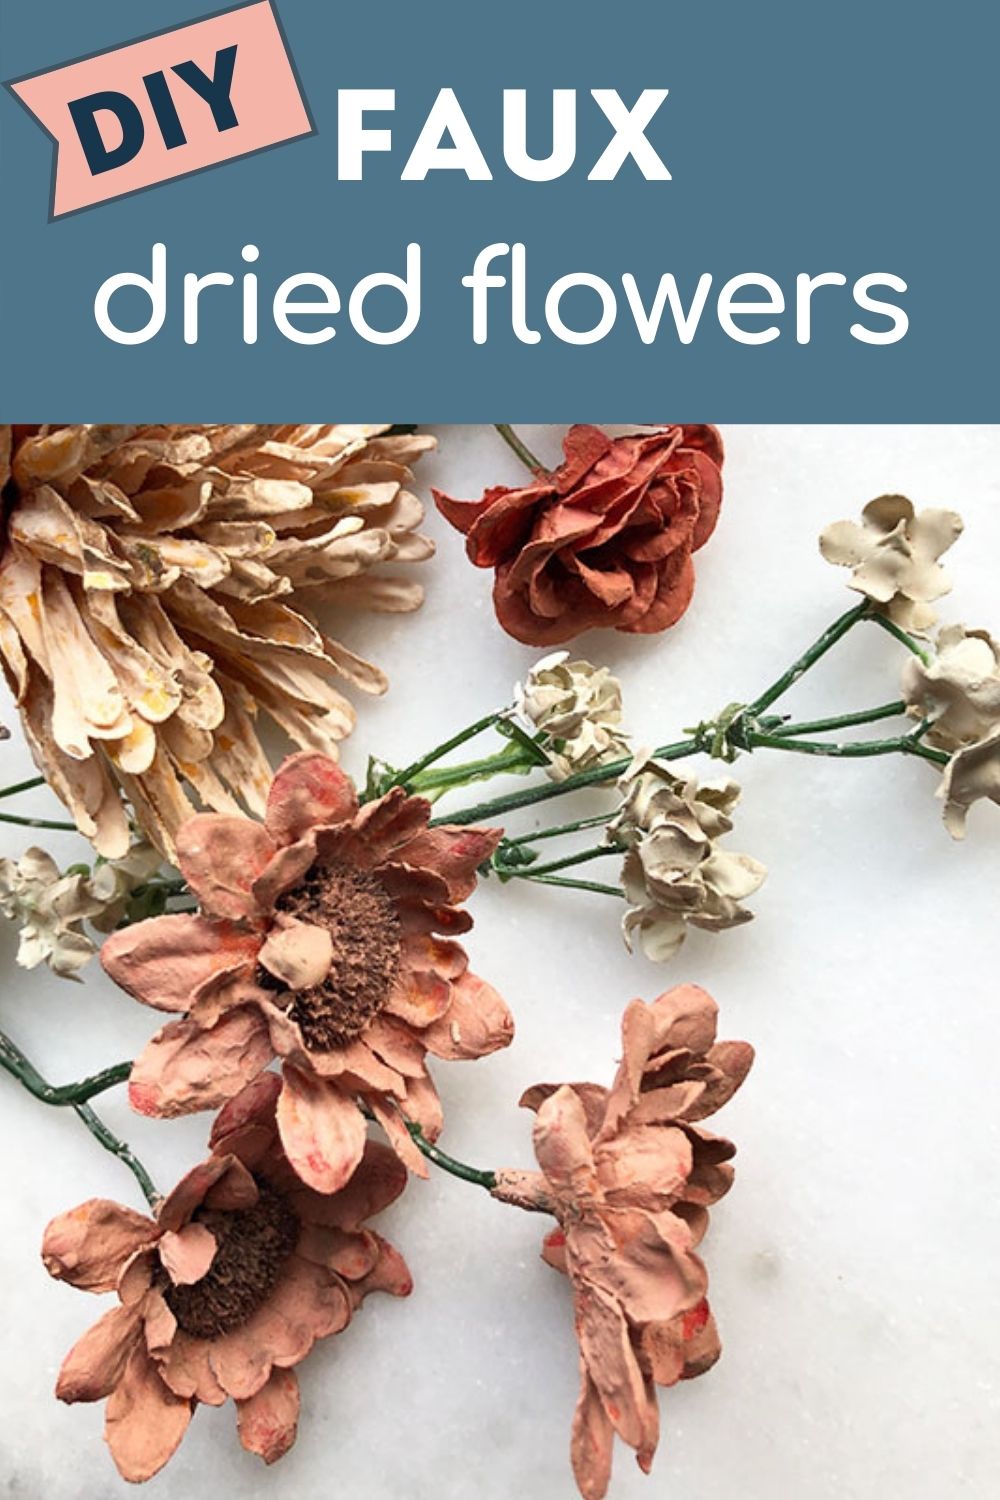
How to Age Silk Flowers with Plaster
In this post: Learn how to age silk flowers and make them look like lovely, dried flowers…with plaster and glaze.

When I get ready to do a craft project or decorate something for the season, I always need flowers of some kind.
I know we’ve all seen pictures online and in magazines of beautiful rooms with vases bursting with gorgeous blooms. But honestly, I don’t have the time or the money to go and buy several dozen fresh flower bouquets every week.
So, quite often, silk flowers will have to do.
Luckily, there really are some pretty good fakes nowadays. Whoever manufactures these fake flowers has gotten better at it over the years! ?
But for this project, I decided I wanted fake dried flowers.
You know, so they’d look vintage-y and aged. ?
So I turned to an unusual source….plaster.
*Affiliate links used below. You can see my full disclosure here.
How to Age Silk Flowers with Plaster
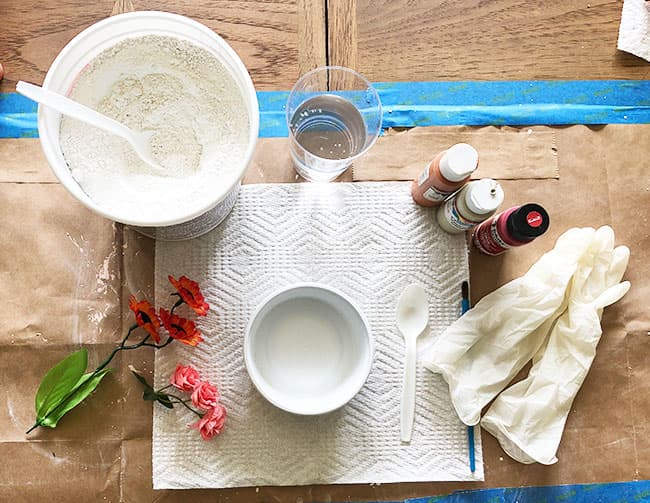
Supplies needed to make aged silk flowers:
-plastic bowl
-two plastic spoons
-silk flowers (cheap ones!)
-gloves
-paintbrush
-craft paint in your choice of colors (I suggest various floral colors plus earth brown)
-cup of water
-paper towels and a protected work surface
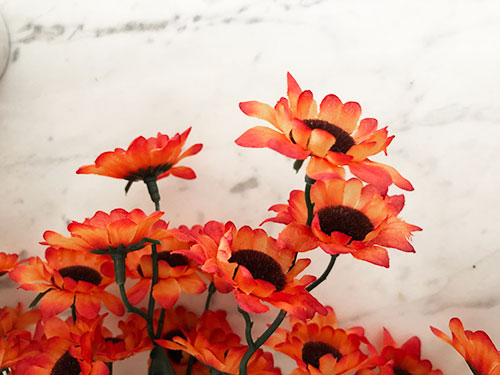
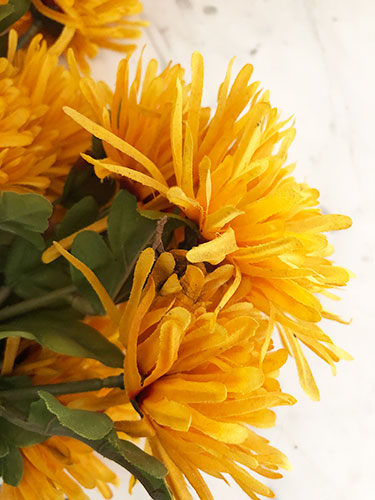
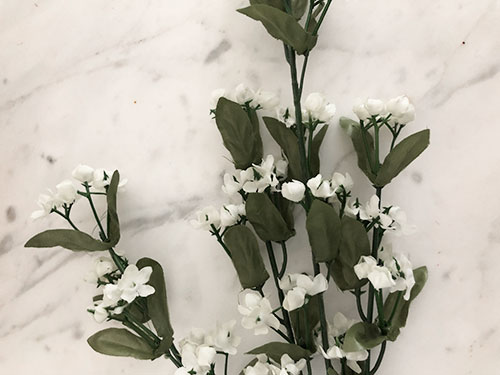
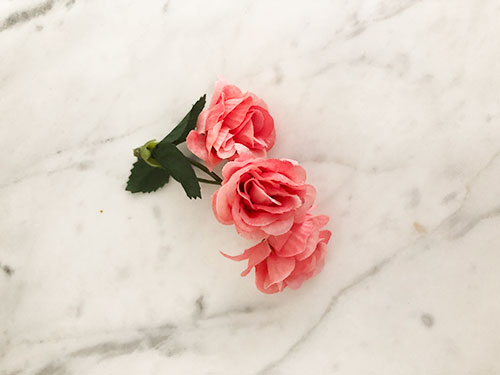
Step 1: Start with cheap, fake flowers
Pick out some fake, silk flowers. This is not the time to buy expensive flowers. Go for the cheapies…the dollar store or bargain bin kind.
Look at these beauties that I started with…
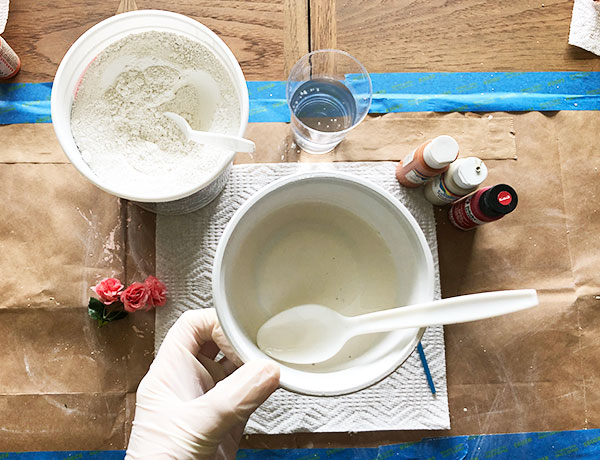
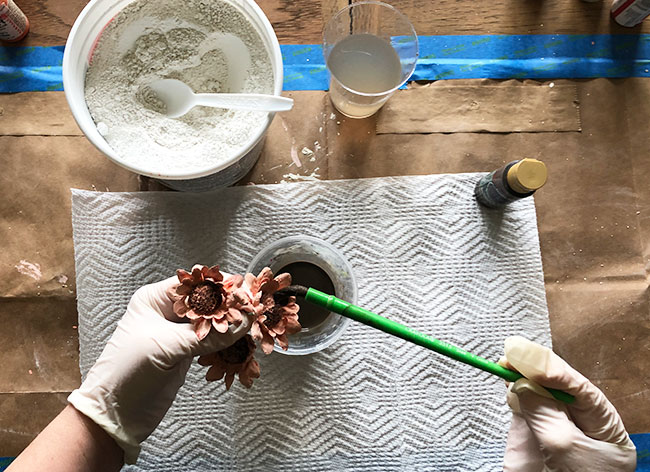
Step 2: Mix Plaster of Paris
Mix some Plaster of Paris with clean water according to the directions on the tub. I just stirred a little plaster and a little water until it was sort of creamy. You want to mix just enough that you can use all of it within about 5-10 minutes because it will start to set up and harden before too long. You don’t want to have to clean out a big mess of hardened plaster from your bowl.
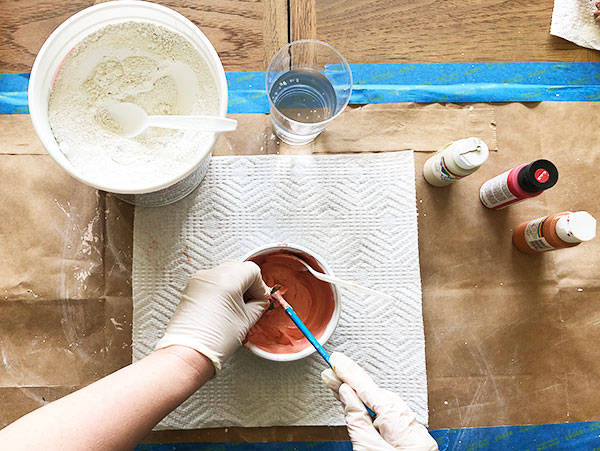
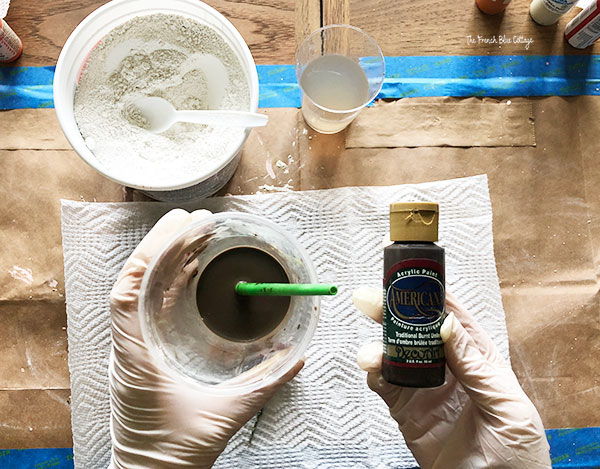
Step 3: Tint plaster with paint
I used a little bit of acrylic craft paint to change the color of the plaster. You can use any water-based paint to tint the plaster.
Keeping dried flowers in mind, I chose a dusty pink, a dusty coral, a brownish yellow, and a creamy white for the flowers I aged this time.
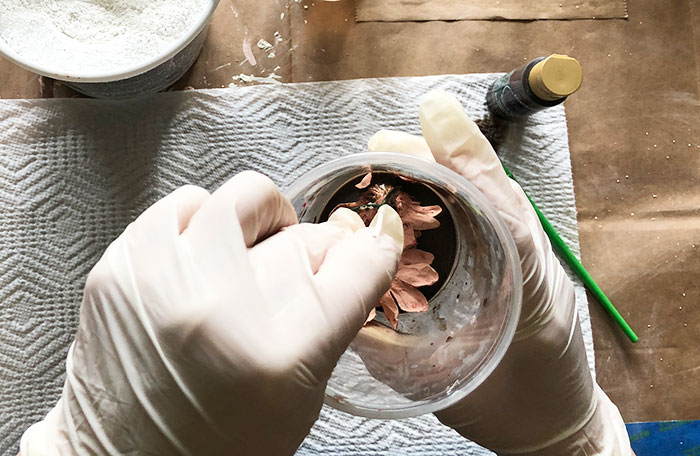
Step 4: Coat flowers in colored plaster
You can paint the plaster mixture onto the flowers with a paintbrush.
Or you can do what I did and just dip the flowers in the bowl and use the paintbrush to help apply it all over.
Allow them to dry. The directions on my plaster say to wait 24 hours, but they felt pretty dry after just a few hours.
You can leave them this way if you are happy with how they turned out.
But if you want just a tiny bit more age, then go on to step 5.
Step 5: Glaze to add a little more age
Dried flowers naturally become more muted in color and a little brown around the edges. To make these plaster flowers look a little more realistic, give them a brown color wash.
Mix some water-based stain or some earth brown or umber craft paint in a lot of water to create a glazing wash. It really needs to be very watery or you’ll just end up dyeing your flowers brown.
Just like in step 4, you can either paint on the antiquing glaze….
or dunk the whole flower into the cup….
If your flowers look too brown, just dunk them into some fresh water for a second and it will lighten the glaze.
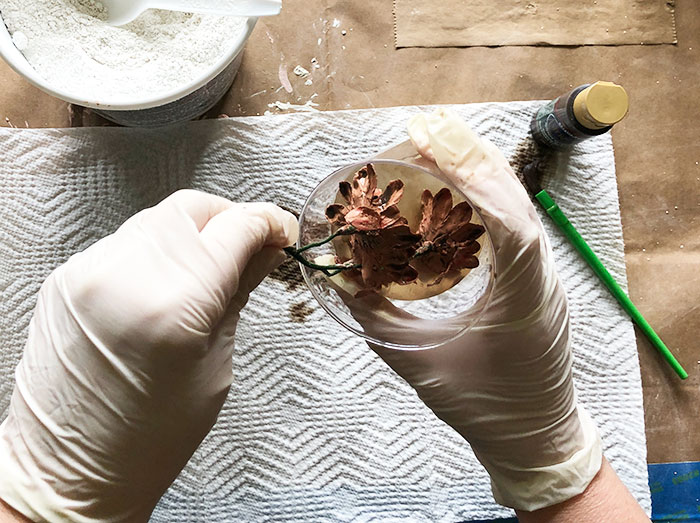
Then lay them out to dry on a paper towel.
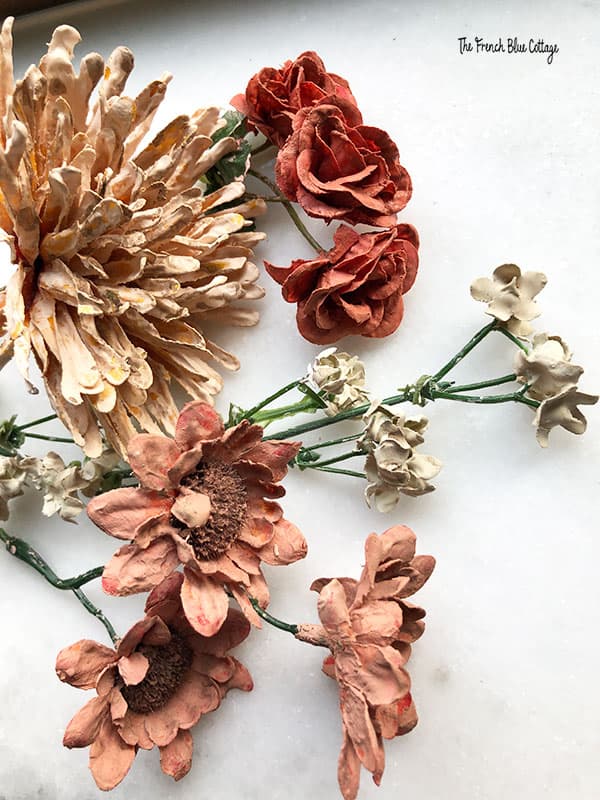
And that’s it!
Good old Plaster of Paris and some watered down glaze turned these cheap-o fake flowers into these gorgeous dried blooms….
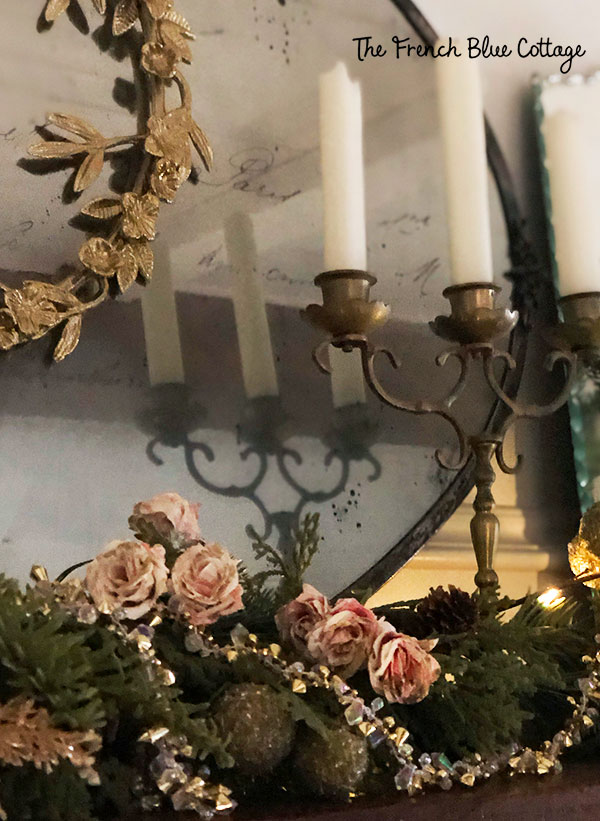
I made some of these last year to use in my Christmas mantel decor….
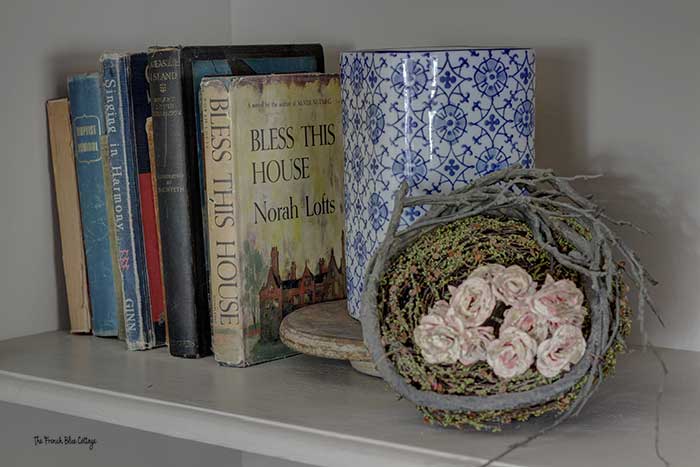
Then after Christmas, I put a few into this nest….
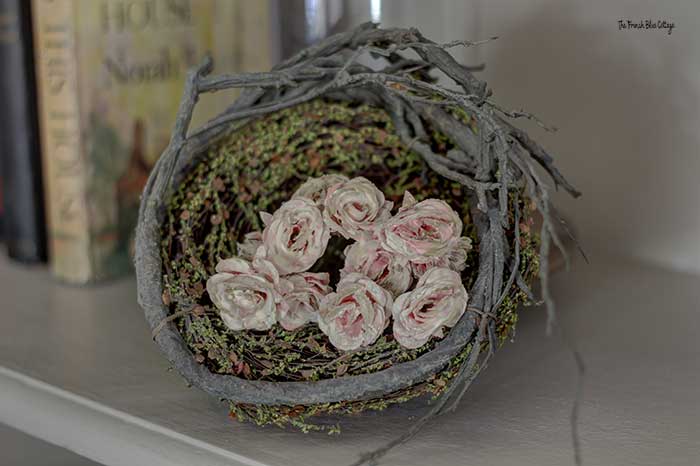
I love this look so much, so they’ve stayed there all year:)
Extra tips for making aged silk flowers:
- They are pretty sturdy once dried, but you should still handle them with care (just like you would a real dried flower).
- If your plaster mixture is too thick, add a little water. If it’s too thin, add some more plaster powder.
- It’s easier to pull off or cut off any silk leaves before you start.
- These flowers are probably best for laying them in a bowl or across a garland, used in a wreath of some sort, or tucked in amongst other flowers. You can experiment, but they might be a bit heavy for standing in a vase by themselves.
- Plaster won’t stick well to the plastic stems. If any gets on the stems, I wipe it off after it’s dry. I tuck the flowers into other things, so that the stems aren’t showing anyways.
- After each batch of flowers that you do, use a paper towel to wipe out the bowl, the stirring spoon, and the paintbrush. Then rinse everything off with water. You don’t want a hardened mess, but you also don’t want to wash loads of plaster down the drain. It’s best to put the majority of it in the trash can first.
Now that you know how to age silk flowers (a.k.a. create fake dried flowers), what kind of project would you use them in?
I’m going to use the plaster flowers I made this week in a really pretty fall arrangement that I can’t wait to show you!

![]()
What a great idea! I have thrown away so many fake flowers because after I got them home they looked so cheap. Finally something I can do with them!
Thank you! I love how some of the newer silk flowers look, but they are really expensive! Sometimes you just have to find a way to make the others work:)
This technique gives silk flowers an amazing dried flower look. I would have a lot of fun doing this project!
If you try it, let me know how yours turn out! Since no two people do things the same, I always love to see another crafter’s version:)
Carrie,
Thank you so much! This is exactly what I’ve been looking for! I’m going to dollar tree as soon as I have my coffee! I love your flowers and hope mine turn out the same!!!
Thank you, Ranell! I’d love to know how yours turn out…I’m sure they’ll be beautiful!
Love how these turned out Carrie, pinned for later. Such a great idea!!
Thank you, Sonya! I appreciate the pin:)
Beautiful! Such a pretty idea for fall.
Thank you, Lauren! I used them in my fall tablescape and I’m really pleased with the muted fall colors:)