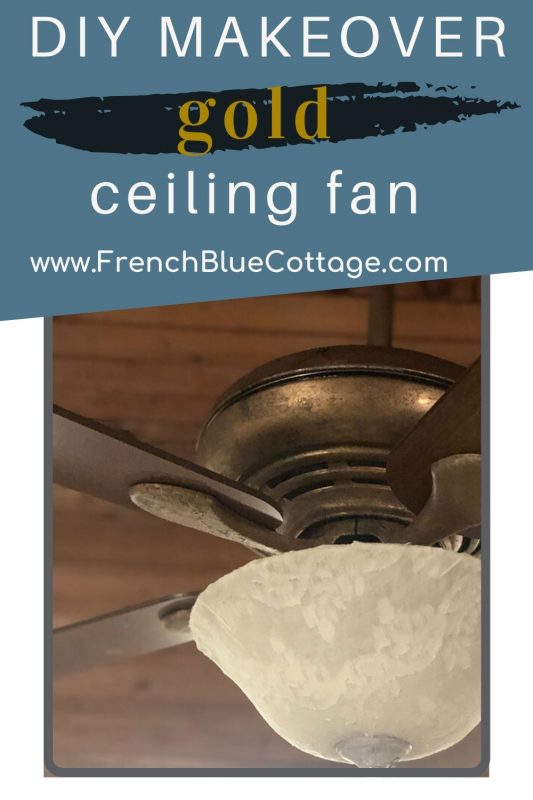
DIY Ceiling Fan Makeover – One Room Challenge {week 4}
A DIY ceiling fan makeover….and you’ve probably never seen one quite like this.?
![]()

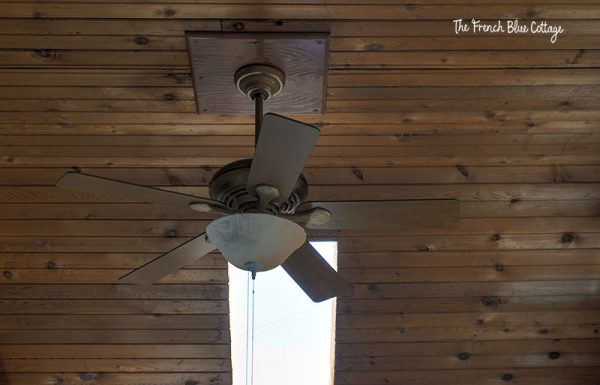
A ceiling fan is one of those things that we love for its function but often despise for its form.
I’m no exception. Truth be told, I’m really more of a chandelier kind of girl.
But the room that I’m turning into my art studio and crafting space seems to run a little hotter in the summer and a little cooler in the winter. It really does benefit from a ceiling fan. Also, the fan that’s in this room is a nice one by Hunter Douglas and it functions just fine.
But other than the function, I hate everything else about it. ?
Welcome back to my One Room Challenge space: Week 4!
Week 1 | Week 2 | Week 3
The design problems:
- The cherry finish on the fan blades clashes with the ceiling.
- The fan blade arms have some weird swirly pattern that is reminiscent of a sea shell.
- The body of the fan is silver and does not play well with anything else in the room.
- The fan light is too modern looking for the space.
Time for an extreme makeover, ceiling fan edition!
One of my mottos is, “If it sits still long enough, I’ll probably try to paint it.” So, let’s get to painting:)
*Some affiliate links used below. I may earn a small commission, at no additional cost to you, if you purchase through one of my links. Full disclosure here.
Time for a DIY Ceiling Fan Makeover
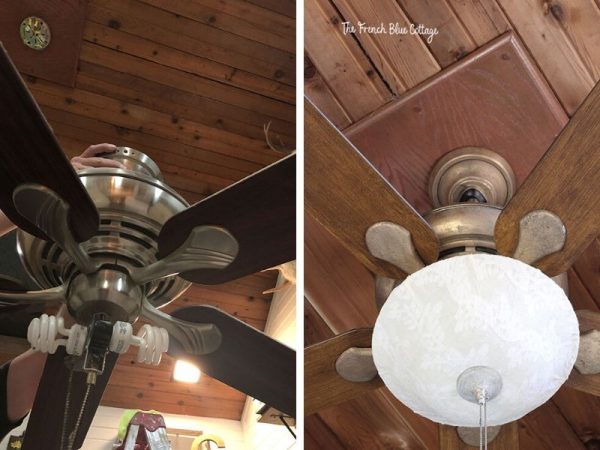
The first thing we did was to take the fan down. In addition to being the wrong style and color for the room, it was also mounted too high. For a fan to function the way it’s supposed to, it needs to be a certain height from the floor, so we added an extension bar. Here’s a good chart that shows what length of downrod you need for your fan based on your ceiling height.
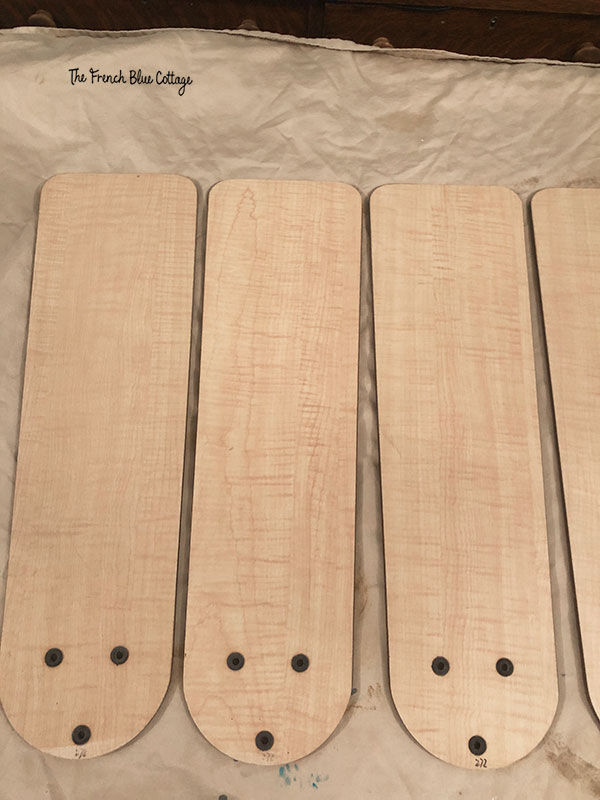
1. Changing the paint finish on the blades:
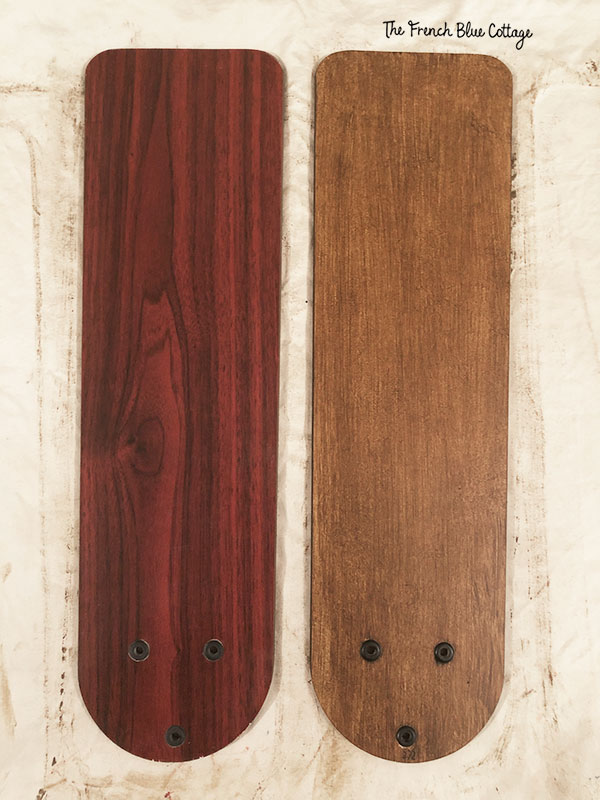
Once the fan was taken down, I realized that while one side of the the blades was cherry, the other side was blonde. I think this is pretty common and it definitely worked in my favor because the blonde finish was easier to cover than the dark cherry.
If your fan blades are not light colored, you would want to paint them a pale neutral color before moving on to the next step.
Step one is to apply a water-based stain (I used my favorite…Stain and Seal by Faux Effects) with a chip brush and then dab over the whole thing with cheesecloth to give it some visual texture. You could also try a water-based antiquing glaze. Or you can even make your own with some clear, tinting glaze mixed with a water-based paint in the brown color of your choice.
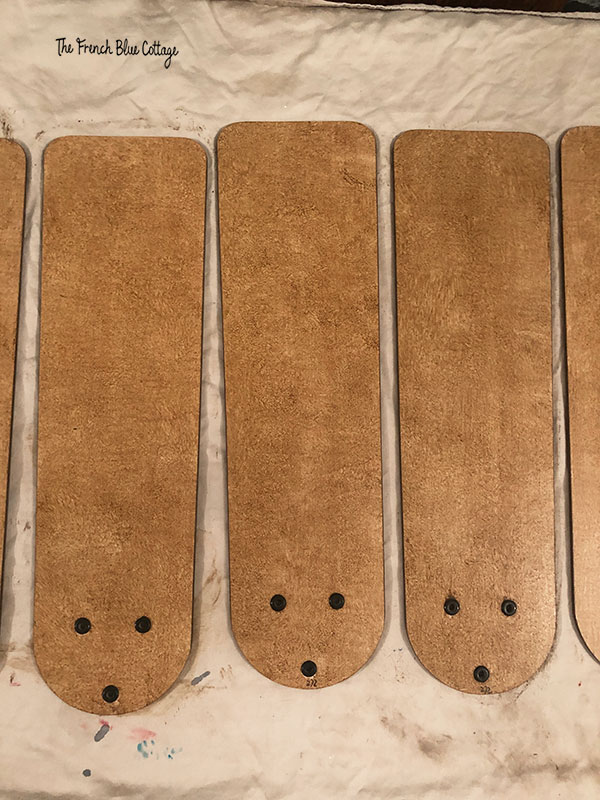
After the first coat is completely dry, put on a second coat of the glaze. Again, use a chip brush to brush on the glaze. But this time gently wipe it back with cheesecloth in vertical strokes until it is the color you want.
Be sure to do all of the fan blades at the same time, so that you end up with the same color value.
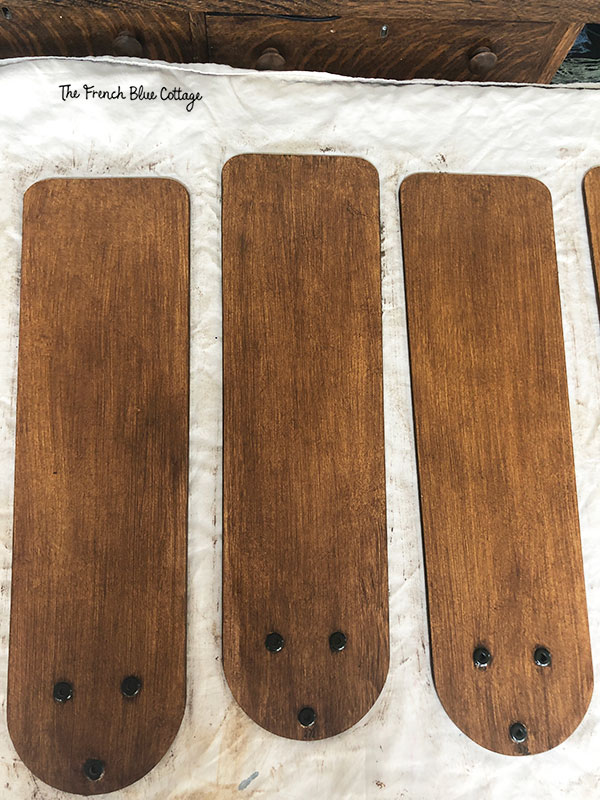
What a difference in the before and after!
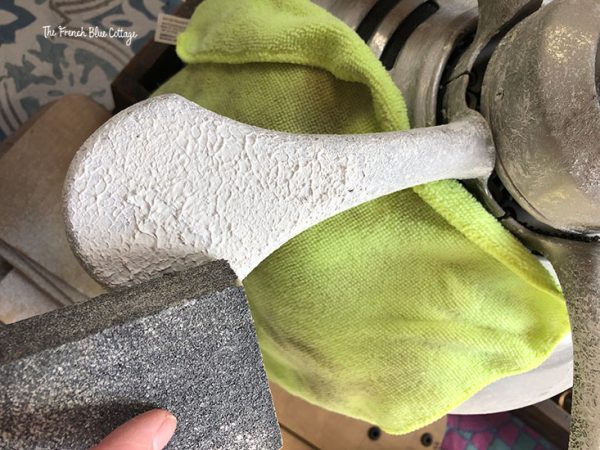
2. Filling in the “sea shell swirls” on the fan’s arms:
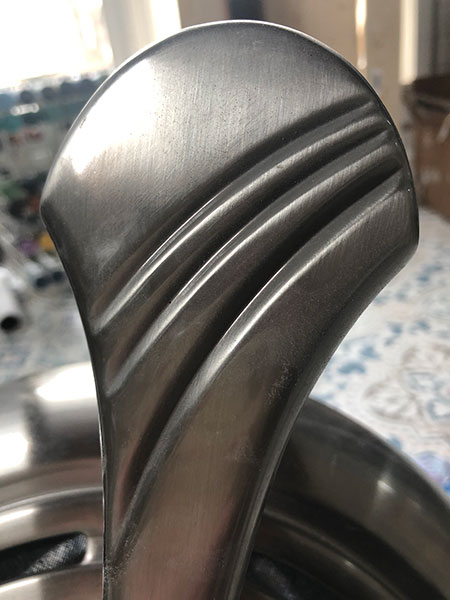
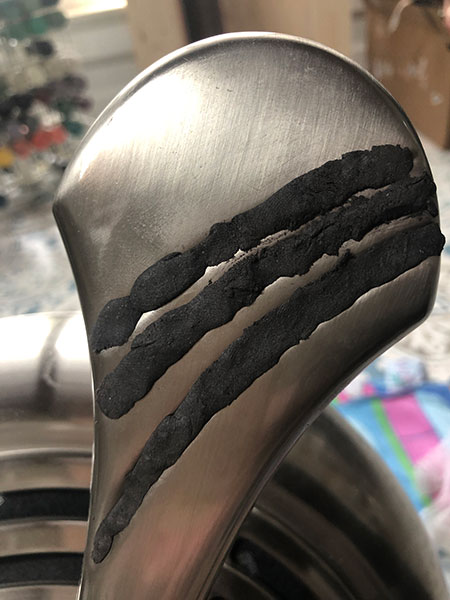
I found this stuff in my craft stash called SteelStik and used it to fill in the grooves on the ceiling fan arms. (Yes, I could have bought a new set of fan arms, but I really wanted to try this technique and to use only what I had on hand.)
You begin by cutting off a small amount and kneading it until it is mixed to a uniform color.
Warning! This stuff stinks to high heaven! Not like a chemical smell, but like a sulphur smell. I tried wearing disposable gloves when working with it, but it was too sticky. I finally gave up and just washed my hands really well afterwards. I think you really are supposed to wear gloves and I probably should have tried a different type.
After a small section is mixed, press it into the grooves, smashing it as flat as possible while filling the area completely.
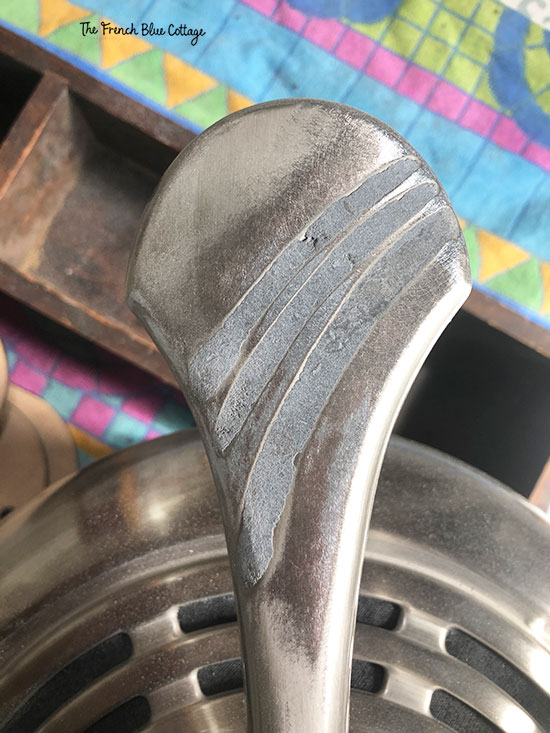
Next, allow it to completely dry and then sand until it’s flush. It sets up in 3-5 minutes and is ready to sand and topcoat in 1 hour.
Here is is after a quick sanding with my orbital sander…
3. Changing the finish on the ceiling fan body:
On to the fun part!
Now, mind you, this was a new finish for me. Typically I try out new finishes on scrap wood, but this time I just threw caution to the wind and went for it. ?
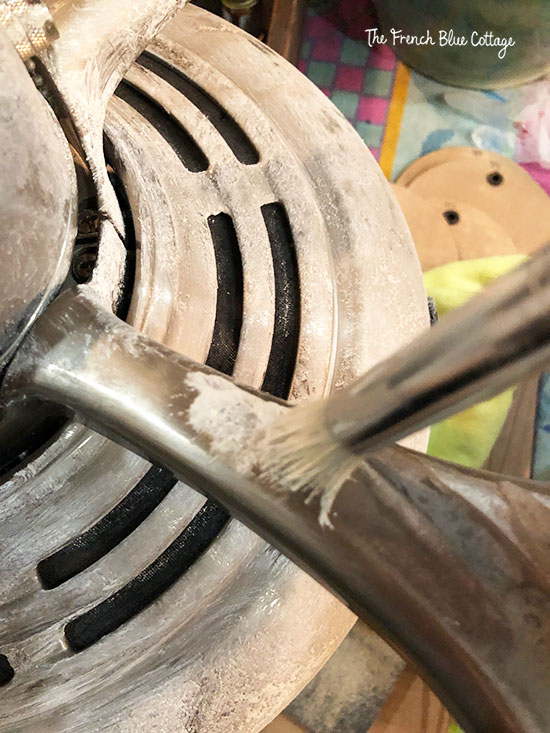
First, I applied joint compound (yes, the kind of joint compound that goes on walls) to the body of the fan and to the fan blade arms. I used a stencil brush to paint the joint compound onto the fan and then softly “pounced” a sea sponge over the surface to give it some texture.
I applied it lightly on the body of the fan, but more heavily on the arms in order to cover up the grooved areas that I previously filled in.
* Here, you can watch a quick video of my technique for applying the joint compound to the fan.
Once it all dried completely, I sanded it down so it still had texture, but more like a hammered finish. Be sure to cover the rest of the fan while you are sanding to keep the dust out of the openings.
This photo is right before I sanded it down…..
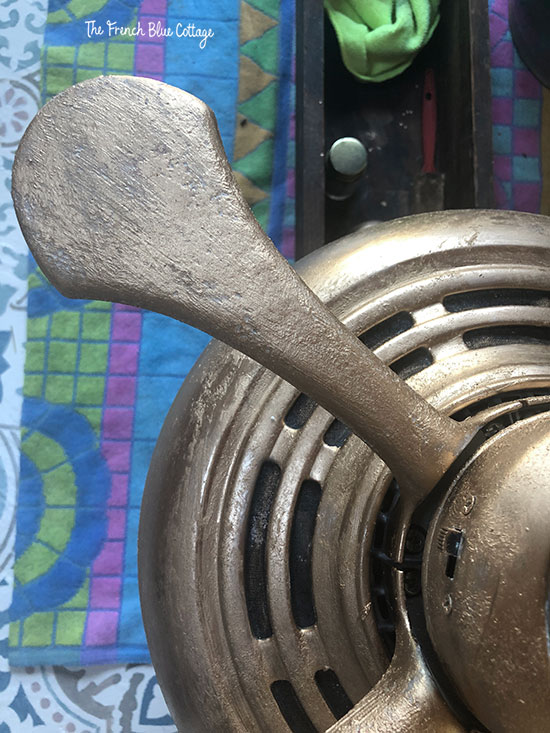
I wiped off all of the sanding dust and then gave it a coat of gilding liquid. I used this gilding liquid to turn this into a gold ceiling fan, but it’s sold out online. Here’s another gilding liquid option.
This turned it into a golden, coppery color.
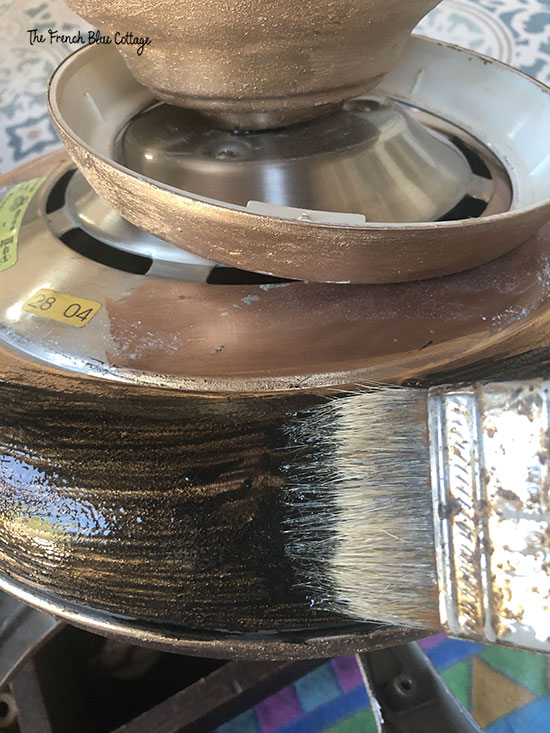
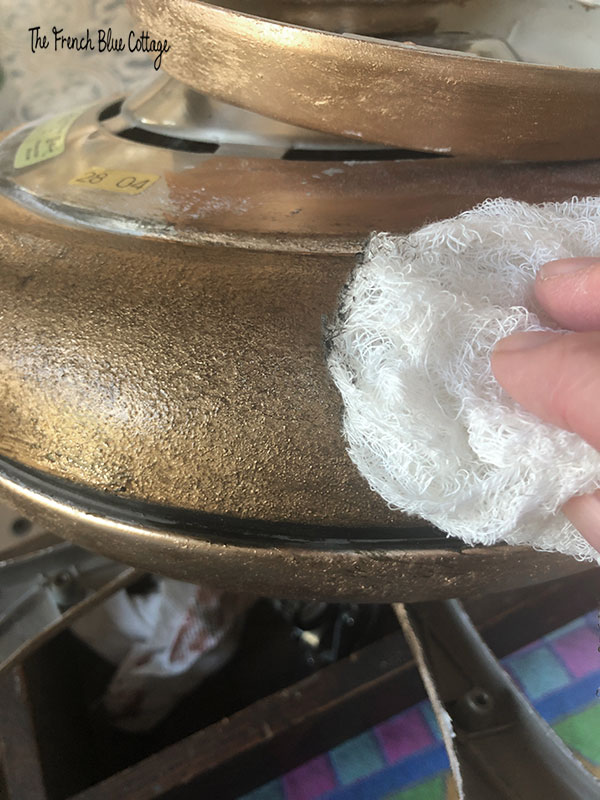
You might like this bold, golden finish and want to stop here. But I wanted the fan to really blend in and not be a major focal point, so I took it one step further and toned it.
For the last step, I used the same stain/glaze that I used on the fan blades. I brushed it on and then used cheesecloth again to pounce and wipe at it until it looked just right to me.
4. A makeover for the ceiling fan light fixture:
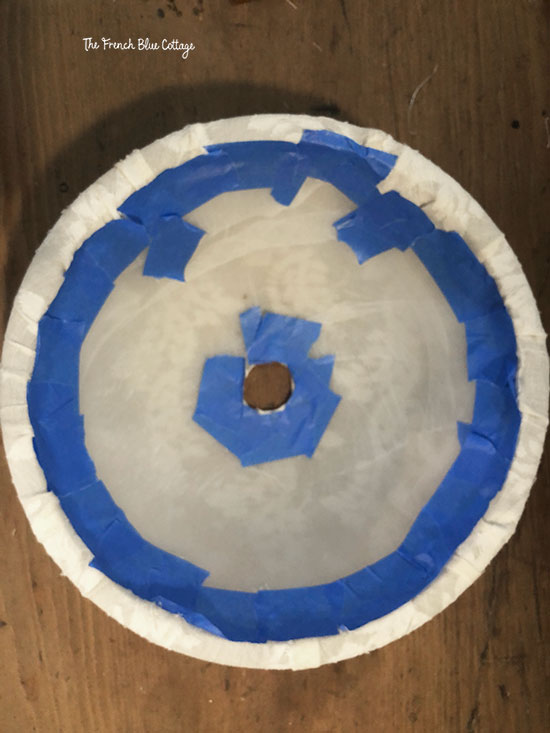
To cover the light, I cut a small scrap of sheer fabric that I had leftover from some curtains and cut a hole in the center. It needs to be pretty sheer so it won’t block too much light.
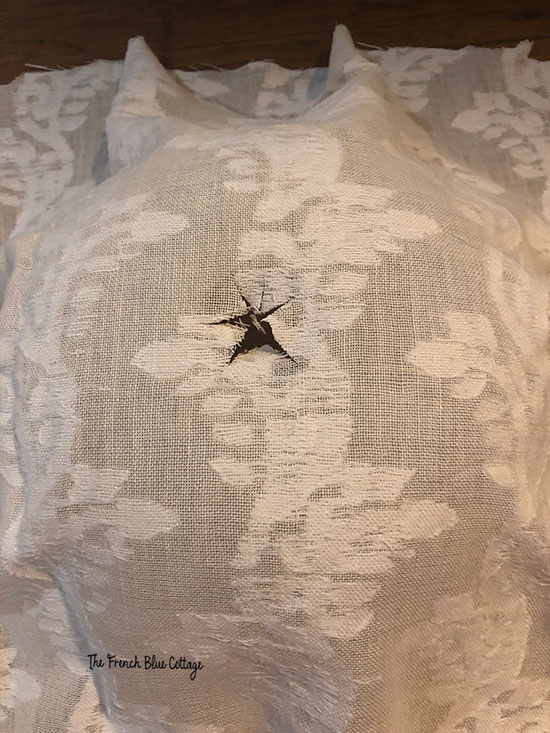
Then, I turned it over and taped everything in place…
Next, I painted on a thick coat of this fabric stiffener and allowed it to completely dry….
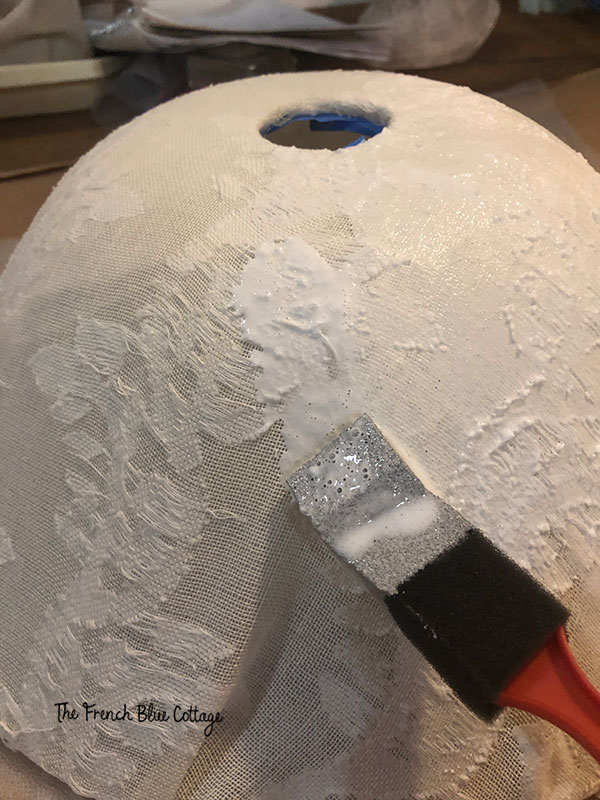
Once dry, I gave it a light sanding with a sanding block to knock down some sharp edges. Then I removed the tape, trimmed the underside edges with a small pair of scissors, and added a couple of dabs of hot glue here and there along the lip of the light fixture to help hold the fabric in place. I’m not sure the hot glue is completely necessary though, because the center cap really holds everything together just fine.
In the end, there turned out to be a few pleats in the fabric but I’m ok with that.
*We are using LED bulbs in this light fixture. They don’t put out much heat. If you are using incandescent bulbs, I’d suggest you feel how hot the light fixture gets before you add fabric to the outside. And definitely don’t put any fabric near the bulbs themselves. ?
Also, I did not want the center cap that holds the light fixture in place to be as dark as the rest of the fan. I added the same joint compound texture, but then I painted it with some leftover “Alabaster” paint that I used on the walls and bookshelves and then just barely skimmed it with some of the gold gilding liquid. It blends better with the light fixture now.
And, voilà, an antiqued gold ceiling fan with a “lace” light fixture….

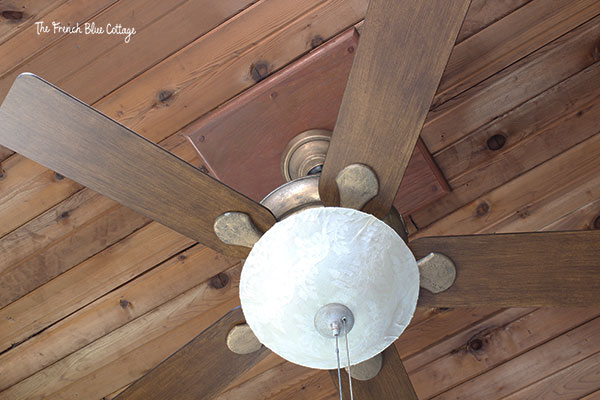

It just blends into the space now….
Before and After….
Things are really changing in here and I’m so glad that you are following along with this makeover! Don’t forget that there are lots of other fantastic makeovers going on in the One Room Challenge.
Art and Crafting Studio To-do List:
paint walls and (possibly) ceiling (decided against painting the ceiling)paint colorful, stenciled concrete floor- re-paint desk area
address lighting and ceiling fan (give it a DIY makeover!)order window shade(install shade)find and buy a pine table(refinishing pine table)- figure out storage needs,
buy baskets that fit,& then organize - buy office chair
- decide on a rug
- make art ledges
- make open shelves
get new cabinet hardware- cover plastic storage drawers
- figure out oil paint storage
- decor items
See you next week!


What an amazing makeover, Carrie! You are amazingly creative to think to fill in the grooves on the arms. I love the antique gold finish that you created along with the new blade color and fabric covered shade. Looking forward to seeing more of this room!
What an amazing makeover, Carrie! You are amazingly creative to think to fill in the grooves on the arms. I love the antique gold finish that you created along with the new blade color and fabric-covered shade. Looking forward to seeing more of this room!
Thank you, Paula! I sure appreciate your sweet comments! I really didn’t want to have to replace the fan and you know what they say, “necessity is the mother of invention”! ?
Wow that’s so creative! I never would have thought of this!
Thanks, Tina!☺️
I really like this; really gives me inspiration to know the possibilities are just as far as your imagination!!!
Thanks, Judith! I really believe that most of the time where there’s a will, there’s a way. ?
Wow! That is quite the transformation! So very creative, nicely done.
Thanks, Libbie! I love trying new paint techniques:)
What a fun fan upgrade I have done blade before but never a glass light bowl that is pretty cool.
Thanks, Jen:) I’d never done a fan light before either. I just couldn’t figure out what kind of light I wanted, so I thought I might as well up-cycle the one I had! ?
I’m a chandelier girl too, Carrie, but I understand how a ceiling fan can be functional. You’ve succeeded at making yours look great! I can’t wait to see how your art & craft room comes together. Pinned 🙂
Thank you, Rebecca:) I so appreciate your sweet comments and your pin! My ORC room is coming along nicely…nearing the finish line!
WHAT? Is that even the same fan! So creative
Thank you, Jewel! It was definitely an extreme makeover. ?
Wow, that is a great makeover! I wouldn’t have thought to add texture to the metal that way! Love the color of the metal, too!
Thanks, Julie! It turned out to be a relatively easy way to get some texture and a color change:)
What a beautiful transformation! You are so creative. I am enjoying seeing your craft room come together. Pinned!
Thank you, Lynne! I sure appreciate your kind comments and the pin! ?
Amazing transformation Carrie!! Love it!
Thanks, Denise! It certainly looks a lot better than before:)