This is What Happens When You Combine Starch, Fabric, and a Bookshelf
Starched fabric wallpaper: a step-by-step guide to an affordable and versatile project.

I wanted an easy button.
I’d spent a week troweling layer after layer of plaster onto my daughter’s bedroom walls as part of her French country room makeover. My arms were tired. But I still wanted to add some pattern to her bookshelves. Could starched fabric be a simple, but beautiful fix?
Now, upholstered walls used to be somewhat popular, but who has time for that!
Let’s try starched walls, instead.
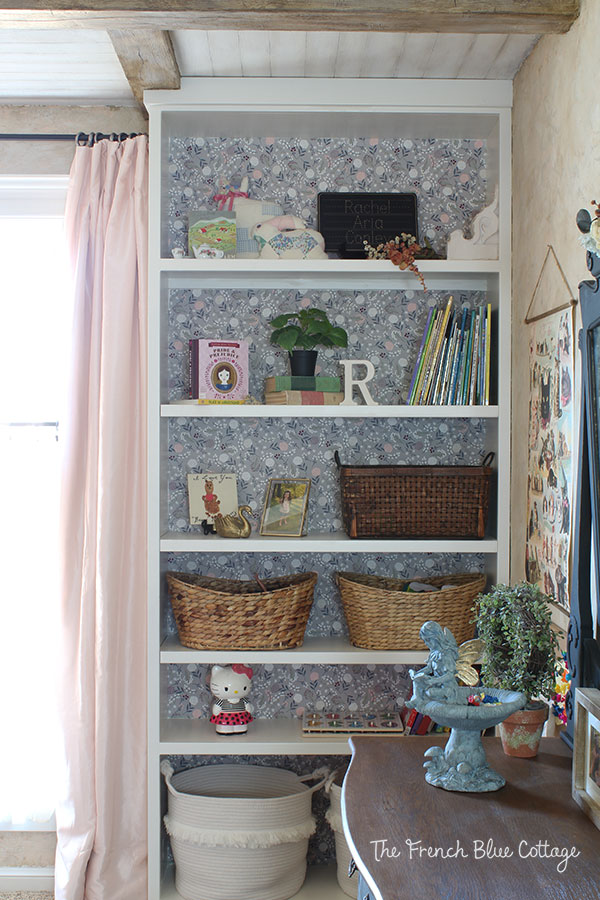
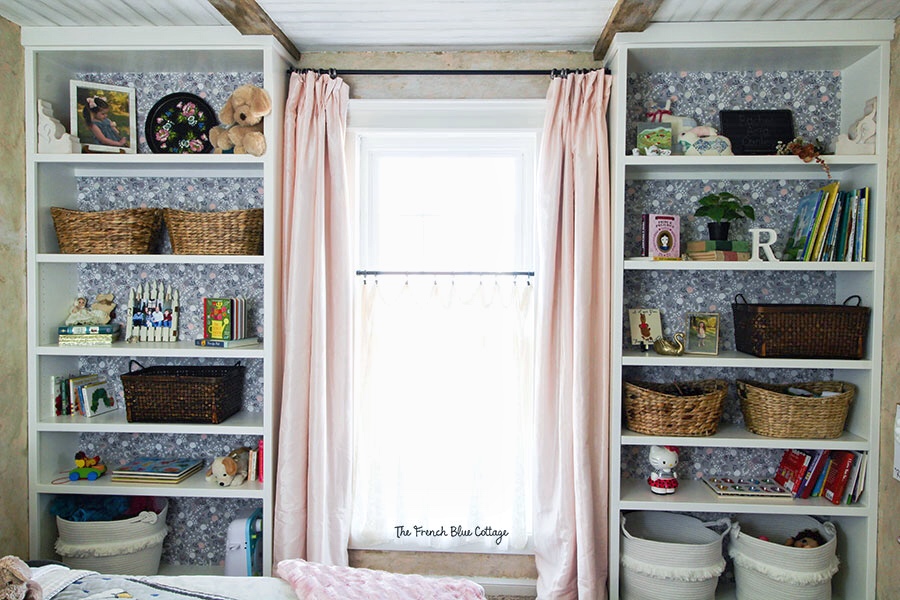
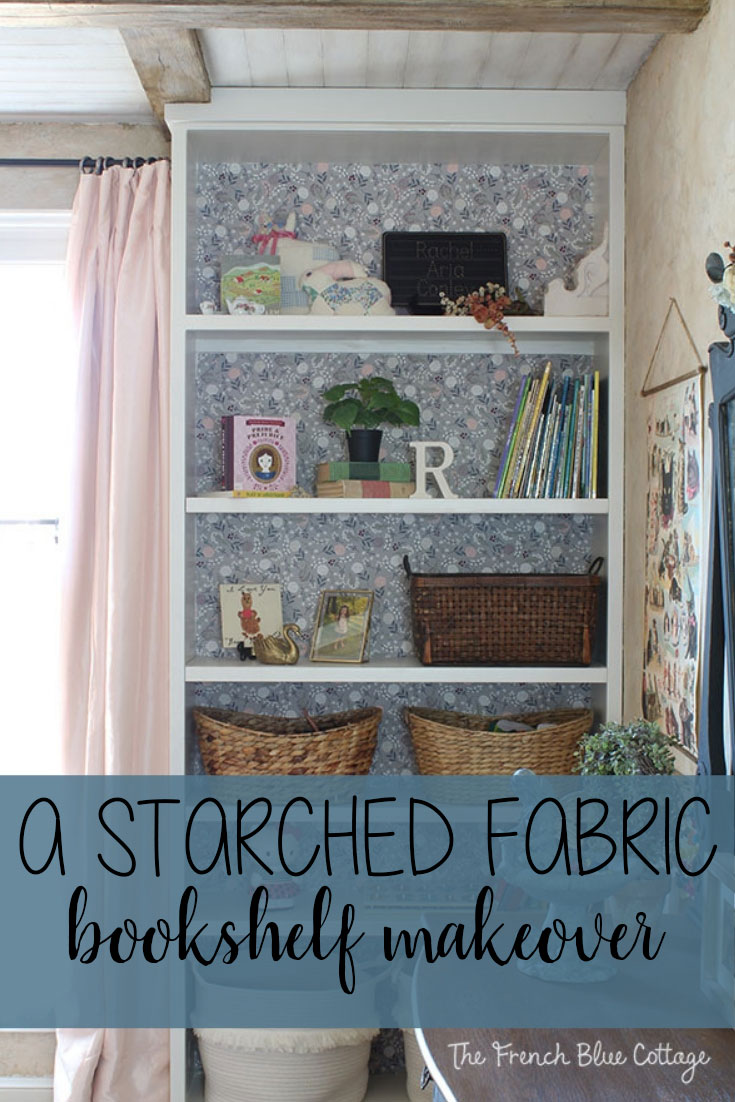
I guess to be more specific, I’m really talking about a starched fabric bookshelf instead of a wall. You may have noticed the patterned backing on the bookshelves in my daughter’s French country room makeover that I shared last week.
That pattern is actually starched fabric…
Related: A letter to my daughter
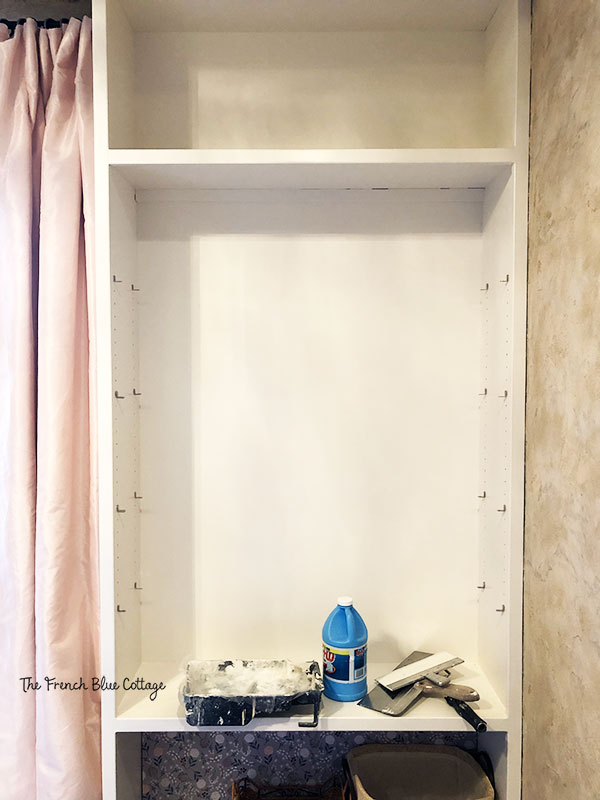
After the bookshelves were built, I painted everything with an enamel/latex paint for cabinets. I loved the all-white look, but knew that I wanted a little pattern and color on the backs of the bookcases.
But again, could I get this look with ease or would I have to subject my poor arms and shoulders to more abuse?
In addition to color and pattern, I also wanted it to be temporary. So, I decided to give the starched fabric wallpaper a go.
Here’s how they started….

Some of the links in this post are affiliate links (full disclosure here).
Here is my supply list:
fabric (I’d suggest a light weight fabric for this treatment)
scissors
measuring tape
self-healing cutting mat (optional)
rotary fabric cutter, similar here (optional)
clear quilter’s ruler or metal yardstick (optional)
liquid starch (I used Stay-Flo concentrated)
angled paintbrush
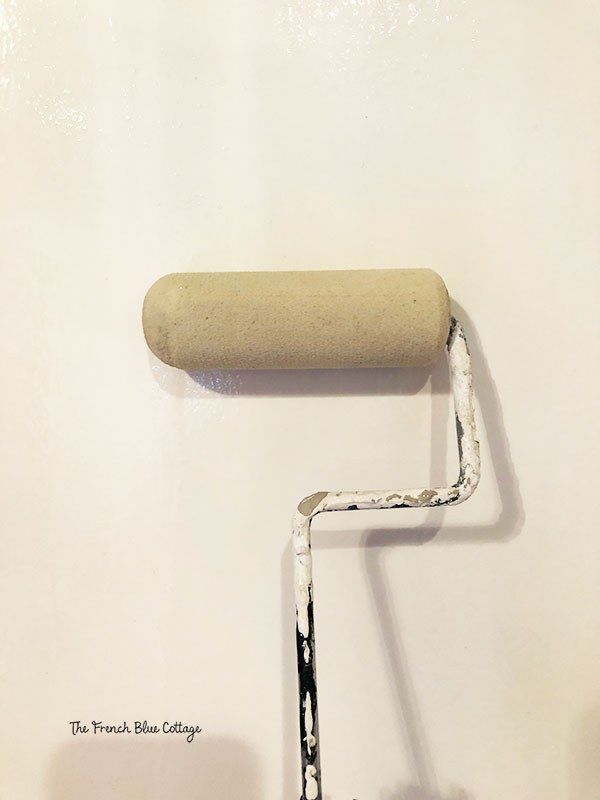
small paint roller
foam roller cover
paint tray
X-acto knife with extra blades
taping knife or other straight edge
wallpaper brush or smoother
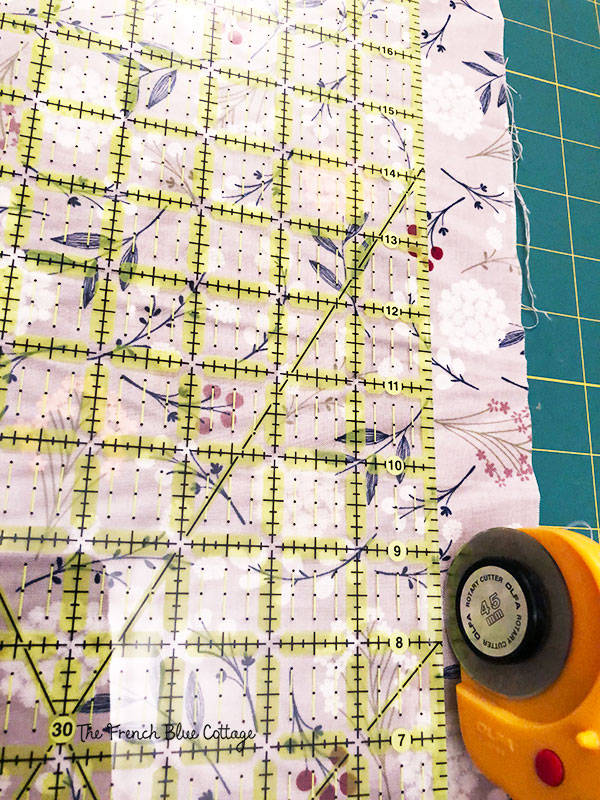
Step 1: Measure and Cut Fabric
Measure the back of your bookshelf, adding an inch or two on all sides. You really want to get this right, so measure twice and cut once:)
Then, using your scissors or a rotary fabric cutter, self-healing mat, and a large quilter’s ruler or metal yardstick (don’t use a wooden yardstick with a rotary cutter…just ask me how I know this?), cut your fabric to size.
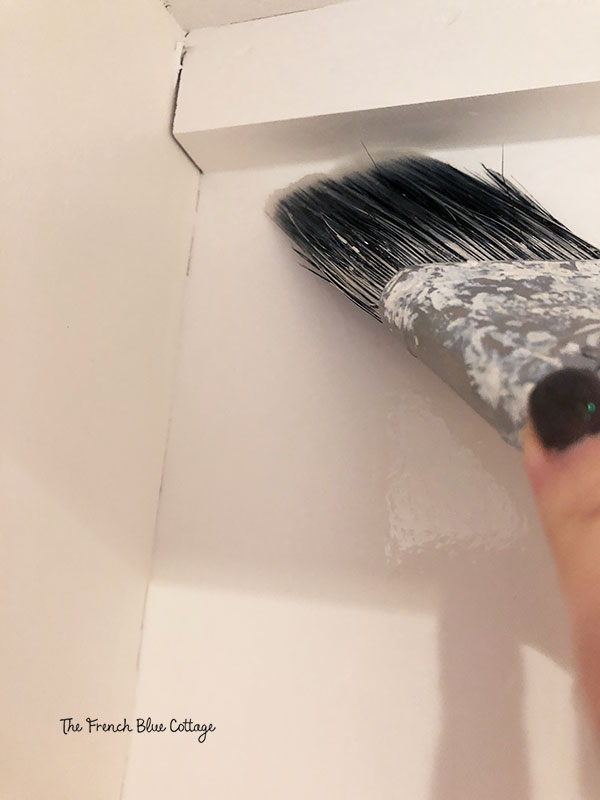
Step 2: Apply Liquid Starch
Pour some liquid starch into the paint tray. Using an angled paintbrush, paint the corners and edges of the bookshelf back with liquid starch.
Don’t be shy; use plenty! Then use the paint roller to roll a coat of starch onto the rest of the bookshelf back wall….
Step 3: Hang the Starched Fabric “Wallpaper”
Working quickly, place your fabric onto the bookshelf. I started by lining up the top and one side and then working from there. You may need to lift and reposition a bit to get it straight. It was helpful to me to use push pins /thumbtacks in a few places to hold the fabric as I worked…
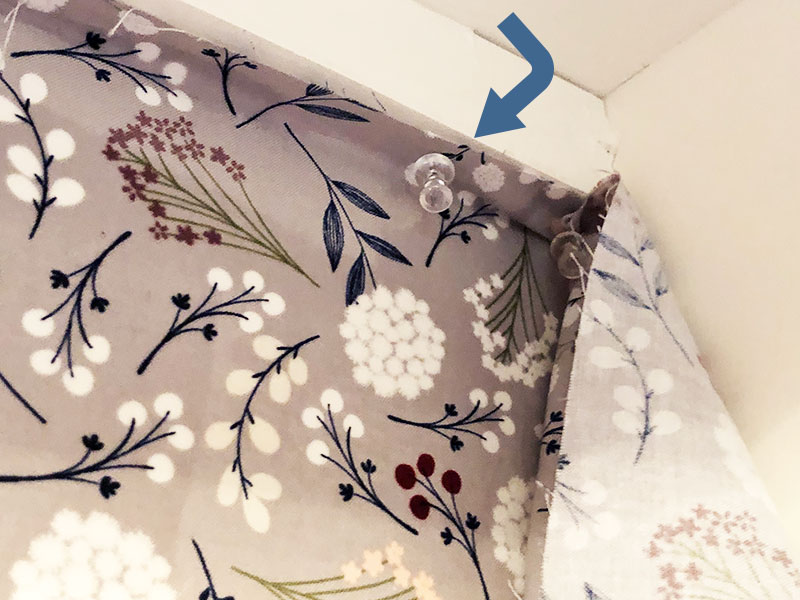
So far, so good!
Step 4: Smooth Out Fabric
Next, start smoothing and working out all of the bubbles. You can use a wallpaper smoothing tool, a wallpaper brush, or even a rag to smooth out the fabric.
If an area dries out, simply lift the fabric and use your paintbrush or roller to add some more starch.
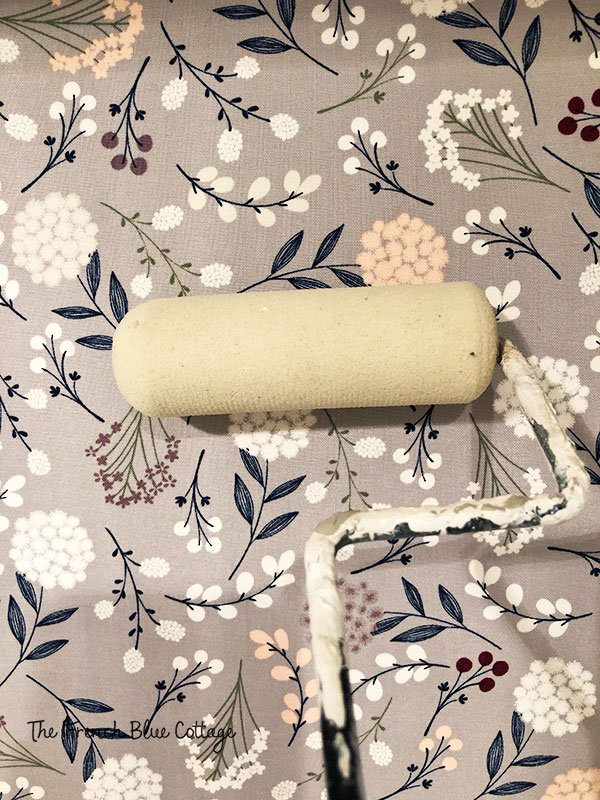
Step 5: Roll Another Coat of Starch on Top of Fabric
Use the paintbrush and the roller to apply a second coat of starch on top of the fabric and allow it to dry…
Step 6: Trim the Edges
The starched fabric dries pretty quickly and then it’s ready to be trimmed. Use a straight edged tool, such as this taping knife, and an X-acto knife to trim away the excess fabric. Be careful to keep the blade in the crevices where the wood sides join each other and not to cut into the wood of your bookshelf.
Also, be sure to change blades as soon as it begins to dull. You will save the edges of your fabric, a ton of time, and your sanity if you don’t try to hassle with a dull blade!
Step 7: Touch Up
After the fabric is trimmed, if there are any little areas where the fabric lifted, just add a bit more starch to the underside and/or the top side and it will stick right down.
Once everything is dry, it will stay put until you decide to pull it off.

So, what’s the verdict?
This really did turn out to be a simple and beautiful fix.
It took just a few hours one afternoon to do both bookshelves.
Additionally, if and when we decide to change patterns or go back to just the painted backs, all we have to do is pull the fabric off and wipe down the bookshelf.
It’s a fantastic way to add a little color and pattern to a bookcase!


So pretty!! Makes a huge difference.
Thank you:) Yes a big difference for just a little cost and effort.