Embroidery Hoop Wreath for Fall
Have you seen those cute wreaths made from embroidery hoops? Most of them are just the hoop, but with a flower swag of some sort on the top or the bottom. I needed a new fall wreath and decided to make one of these for my front door.
But I wanted some actual embroidery in my embroidery hoop. Read on to find out how to make one:)
*Some affiliate links used below. See my full disclosure here.
Here are the supplies I used (except I ended up not using the sunflower, but instead made a bow)…
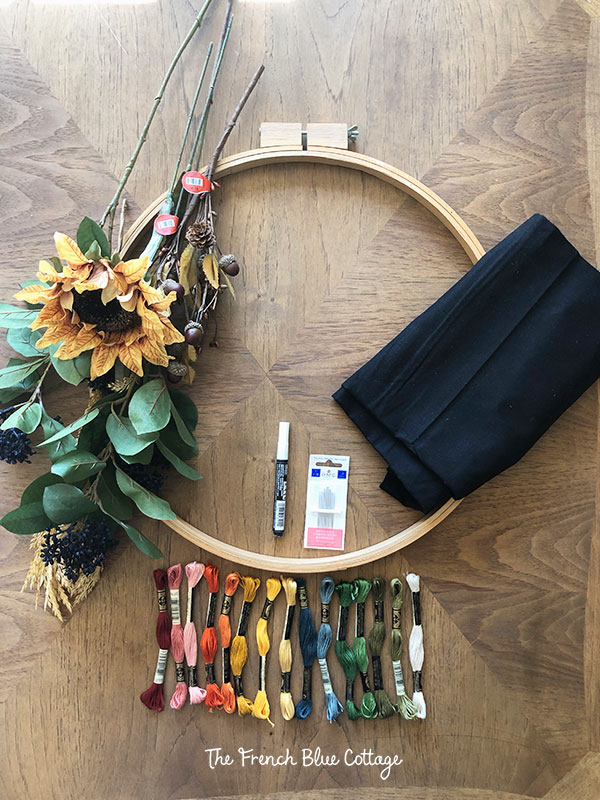
Embroidery hoop wreath supplies:
-
wooden embroidery hoop (mine is about 18 inches across) 18 inch here ; 14 inch here
-
embroidery floss (any local crafts store)
-
embroidery needle
-
linen fabric that fits your hoop twice
-
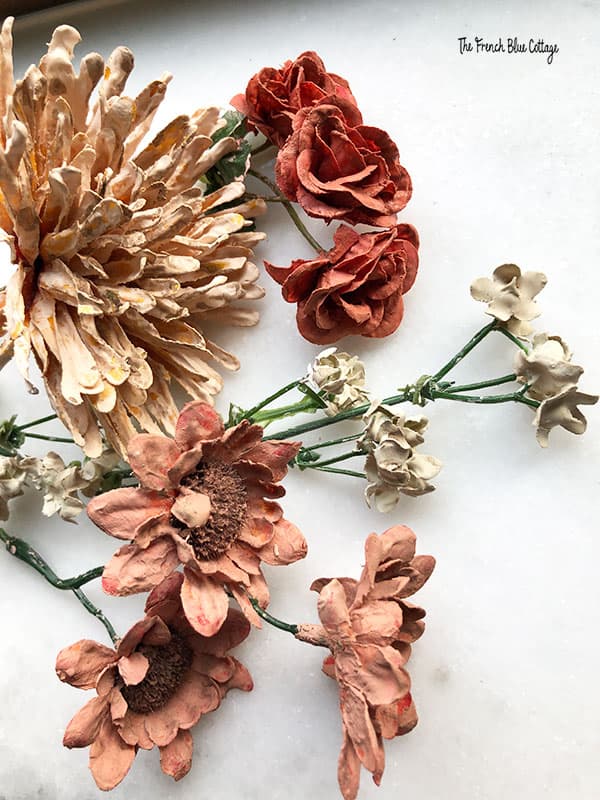
faux flower stems of your choice
-
ribbon for hanging and for the bow
-
hot glue
-
chalk marker (optional)
This doesn’t actually have to be a fall wreath at all. Just choose whatever embroidery thread colors and floral stems you like.
Embroider the Flowers:
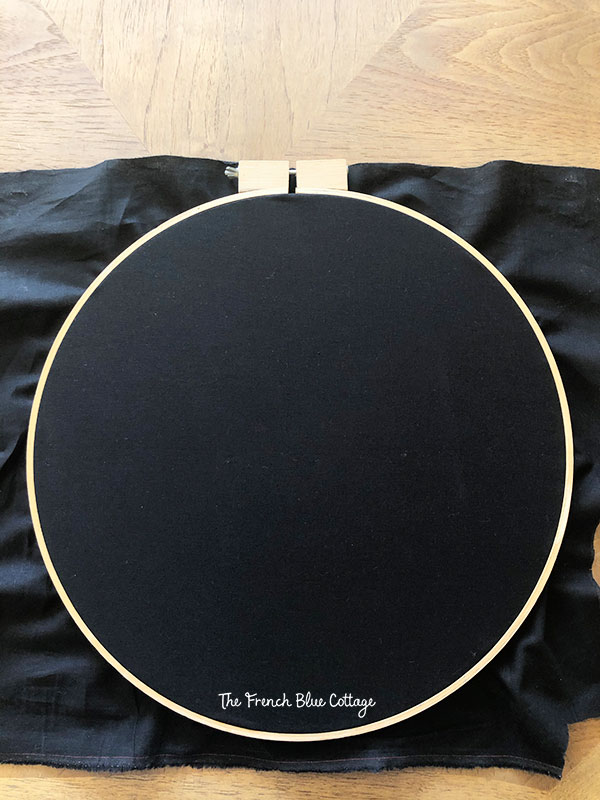
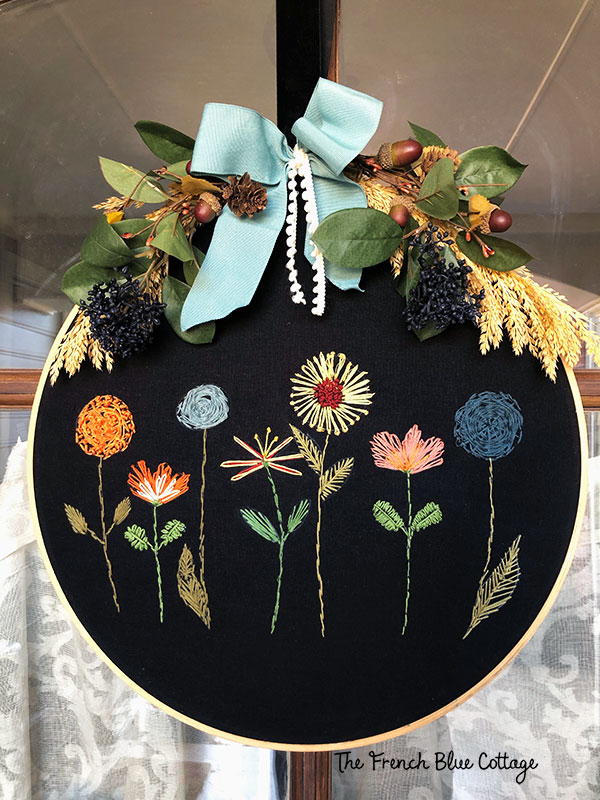
First, I placed some black linen blend fabric from Hobby Lobby into my embroidery hoop, pulling and tightening until it was snug…
Now you might think that one should know how to embroider before making an embroidery hoop wreath. But I had never tried this before. So what should I do? YouTube, of course!
I watched this video on how to make some “simple” flowers. I say “simple” because they’re not that difficult to stitch, but they definitely took some time. I embroidered these while watching tv and it took me a couple of evenings to get it finished.
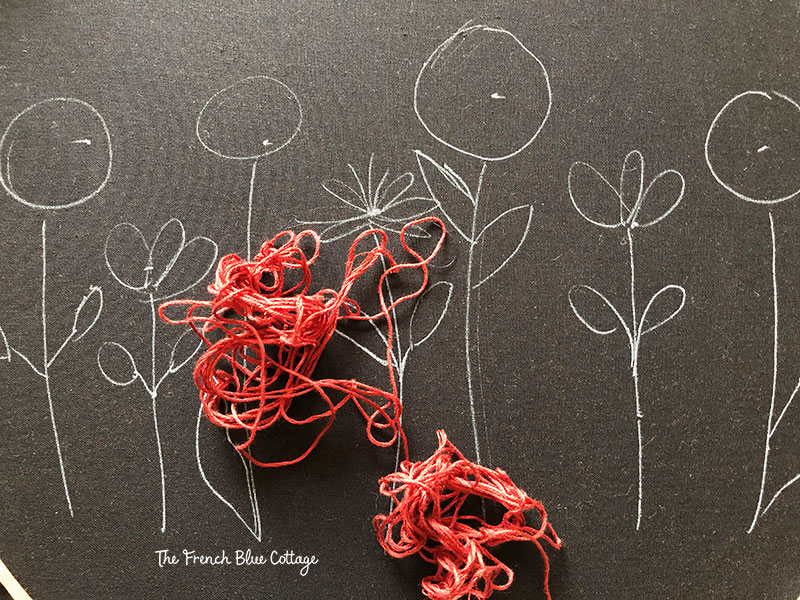
After first watching the video, I planned where I wanted to place the embroidered flowers and sketched them onto a piece of paper….
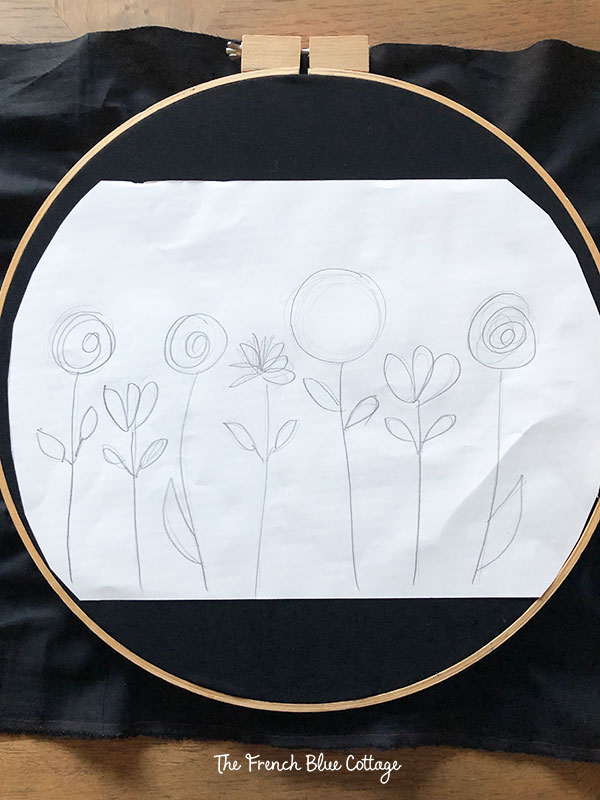
I used this as a general idea and then drew them onto the linen with a chalk marker….
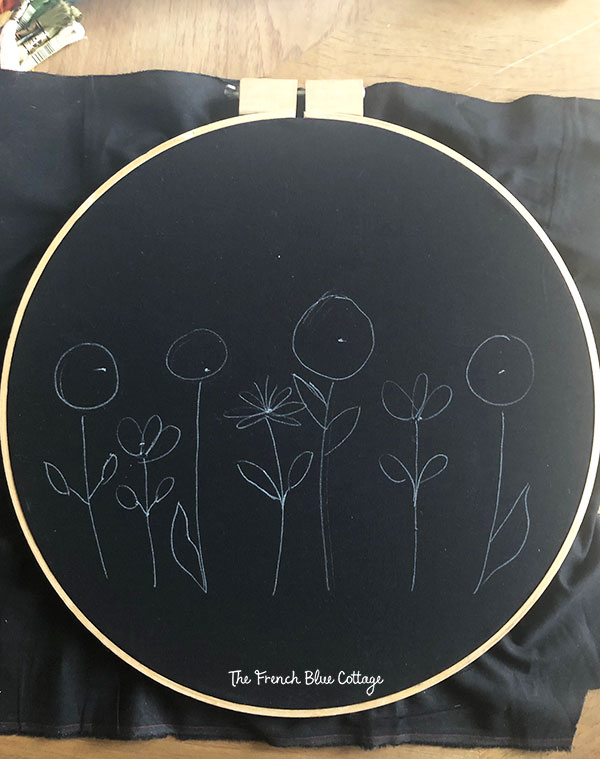
Now, I will say that if you don’t cover your marks completely with your embroidery thread, they will need to be scrubbed off. If you don’t want to worry about this, you could always free-hand your flowers. I was afraid I wouldn’t get mine straight enough, so the chalk was worth it for me.
The next step is to start stitching. So get your embroidery thread and an embroidery needle and start stitching. This step is easier if your 5-year-old doesn’t remove the paper labels that hold the thread in a nice neat loop! ?
Here’s my finished stitching….
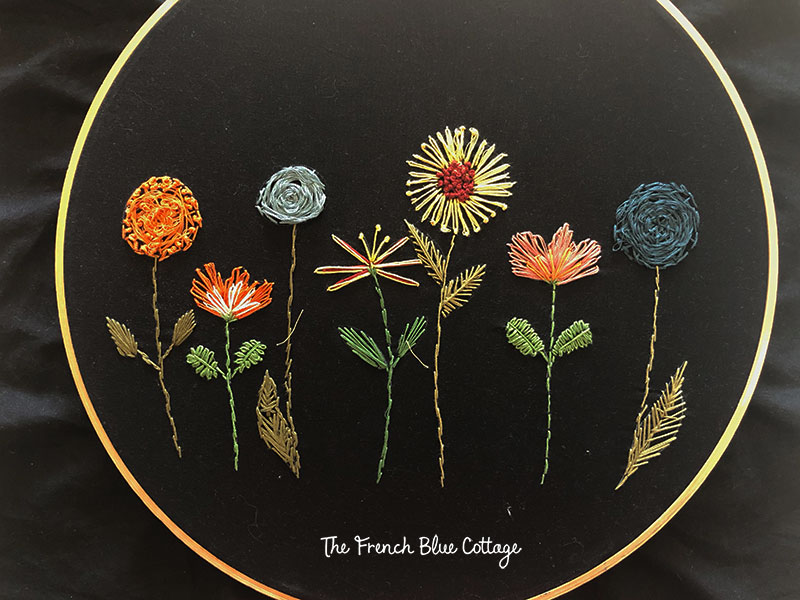
Not perfectly stitched, but cute, right?!
Trim Fabric and Add a Second Layer:
When you’re finished, flip it over and trim off the excess fabric. Here’s what the back of my hoop looks like…
On a total side note: When I saw this, I was reminded of a poem that was often quoted by Corrie Ten Boom. (If you have not heard of her, she was a Dutch woman whose family hid Jewish people in their home during the Holocaust. I highly recommend reading her book, The Hiding Place.)
Anyway, she spoke of this poem about how we often see our lives as the underside of a tapestry, and don’t see God’s plan, which is the front side. I’ll put the poem at the end of this post.

Now, I really wanted my wreath to be opaque. So I cut out another circle of black linen and very lightly glued it to the edge of my hoop on the back side….

You could also cut a circle out of black fabric that and glue it to the back of the hoop itself. This would cover the peek of fabric that shows in between the hoops on the back.
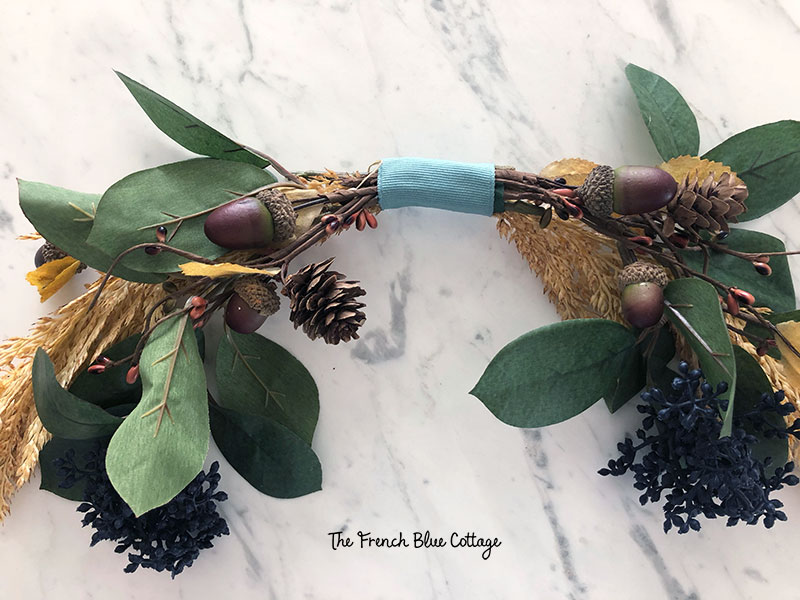
Make and Attach Floral Swag:
The hard part is done, and all that is left is the floral swag. I simply gathered a couple of faux stems into a swag shape and connected them with green floral tape…
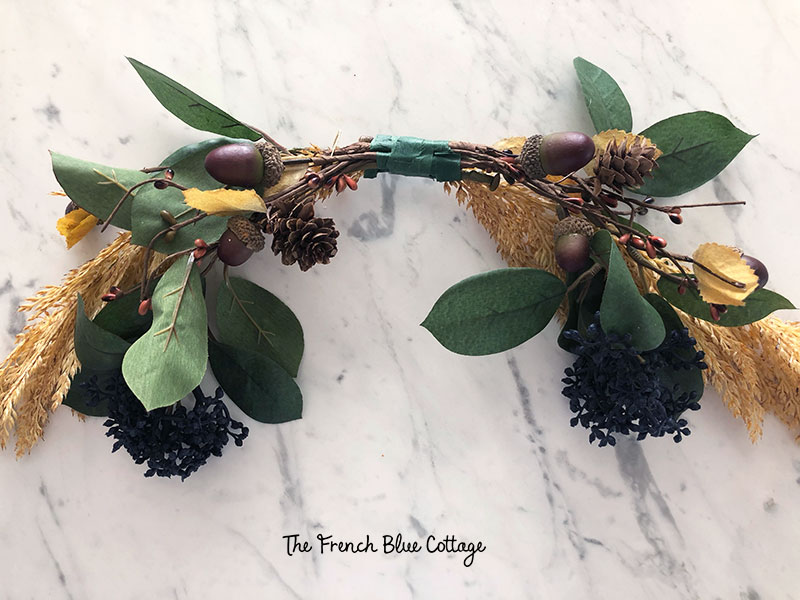
Then I covered the floral tape with ribbon…
Poke a length of ribbon through the top of the hoop (I used black velvet ribbon)….
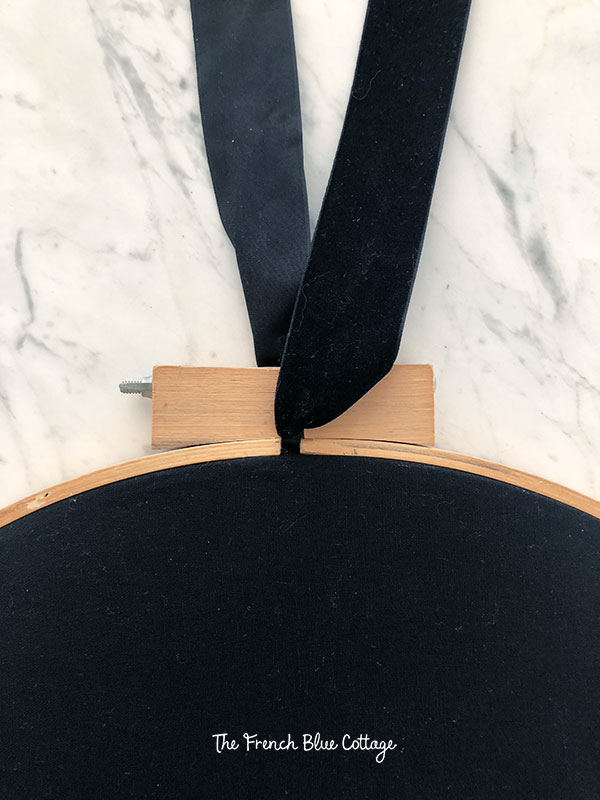
Move the front section of ribbon out of the way. Lightly hot glue the swag onto the embroidery hoop and then move the ribbon back over the top of it….

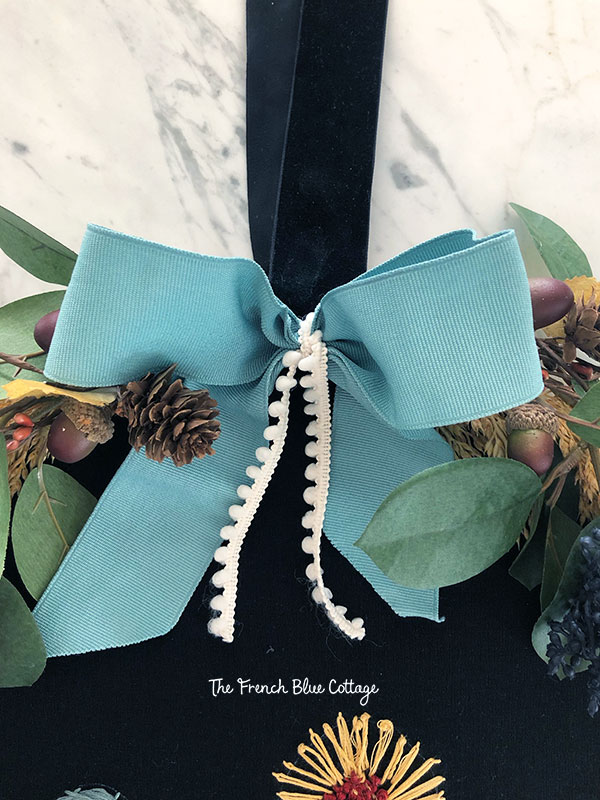
Add a Bow and Hang Your New Wreath:
Add another little dab of hot glue to attach a bow and your fall embroidery hoop wreath is complete….
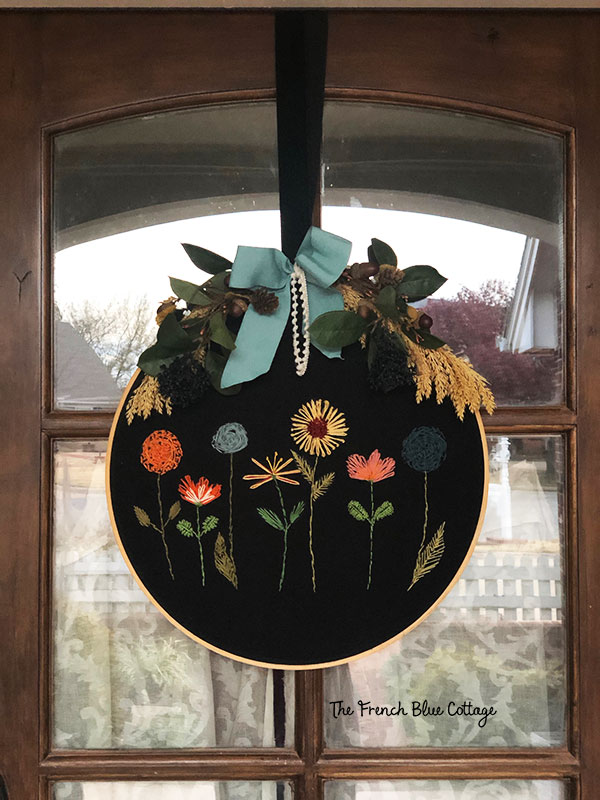
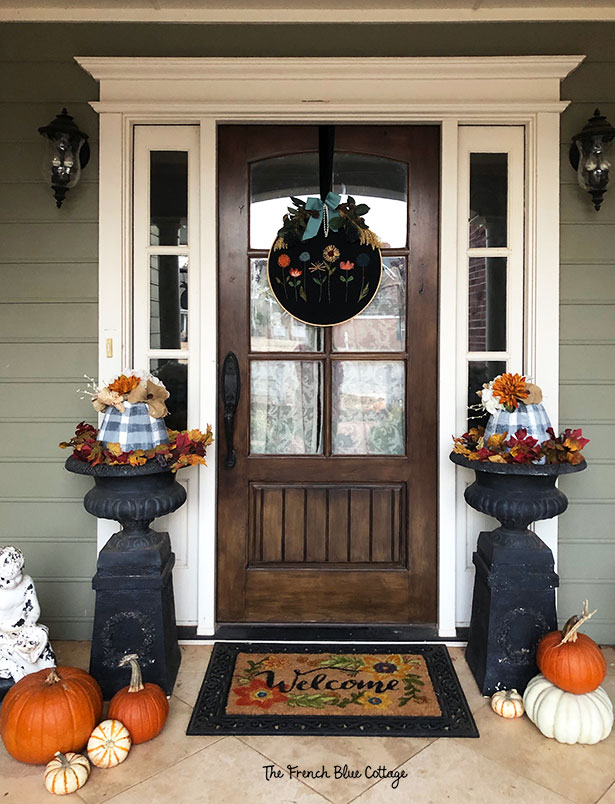
I hung my wreath on the front door.
This is how I hang my wreaths when I don’t use a metal wreath hanger. I have an upside down 3M hook on the interior side of my front door at the top. Tie the ribbon in a bow or knot, hang it on the hook, and then fluff the ribbon until it mostly hides the hook….

(I really should use a clear 3M hook instead of this white one.)
Here’s what it looks like from the front….
Related: Last year’s fall porch
I hope you enjoyed this tutorial for a unique wreath. Have a wonderful week!

The Tapestry Poem – often quoted by Corrie Ten Boom
(originally called “The Weaver” by Grant Colfax Tullar)
My life is but a weaving
Between my God and me.
I cannot choose the colors
He weaveth steadily.
Oft’ times He weaveth sorrow;
And I in foolish pride
Forget He sees the upper
And I the underside.
Not ’til the loom is silent
And the shuttle cease to fly
Will God unroll the canvas
And reveal the reason why.
The dark threads are as needful
In the weaver’s skillful hand
As the threads of gold and silver
In the pattern He has planned.
He knows, He loves, He cares;
Nothing this truth can dim.
He gives the very best to those
Who leave the choice to Him.

That is the cutest thing and it makes such a festive statement!! It would be fun to make one for all seasons.
Thank you! Yes, I’m thinking I might have to make a spring embroidery hoop wreath, too! Maybe I can figure out how to stitch a tree or a bird and a nest:)
Very cute! That’s something that you just learned to embroider! Pinning!
Thanks, Lauren! The embroidery tutorials were very helpful. Isn’t it great that you can learn just about anything from YouTube?!
LOVE this wreath Carrie. I need to watch that YouTube video…I’ve always wanted to learn how to do embroidery. Congrats! You’re being featured tonight at Celebrate Your Story 🙂
Oh, thank you! I’m so glad to be featured! I did love watching that YouTube video. It was actually quite relaxing:)