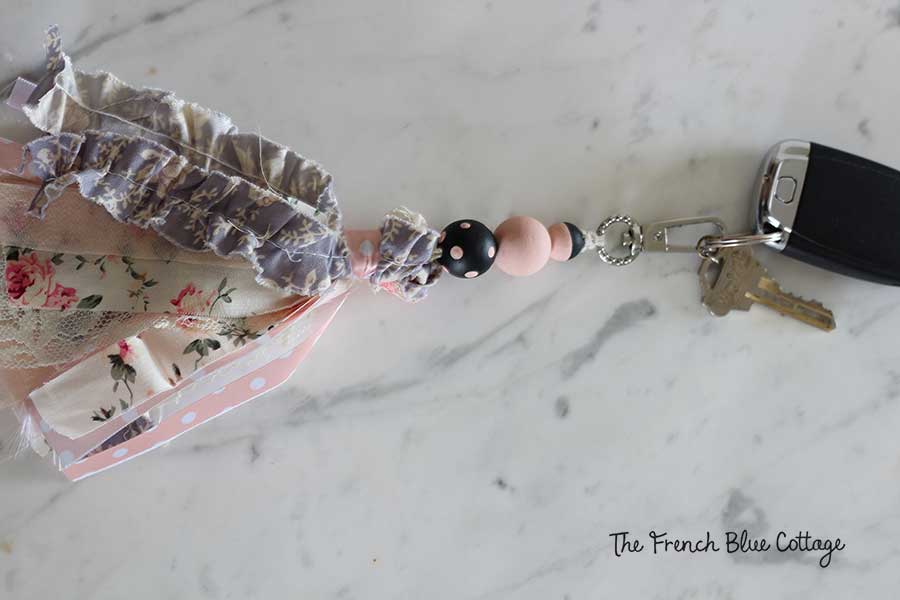
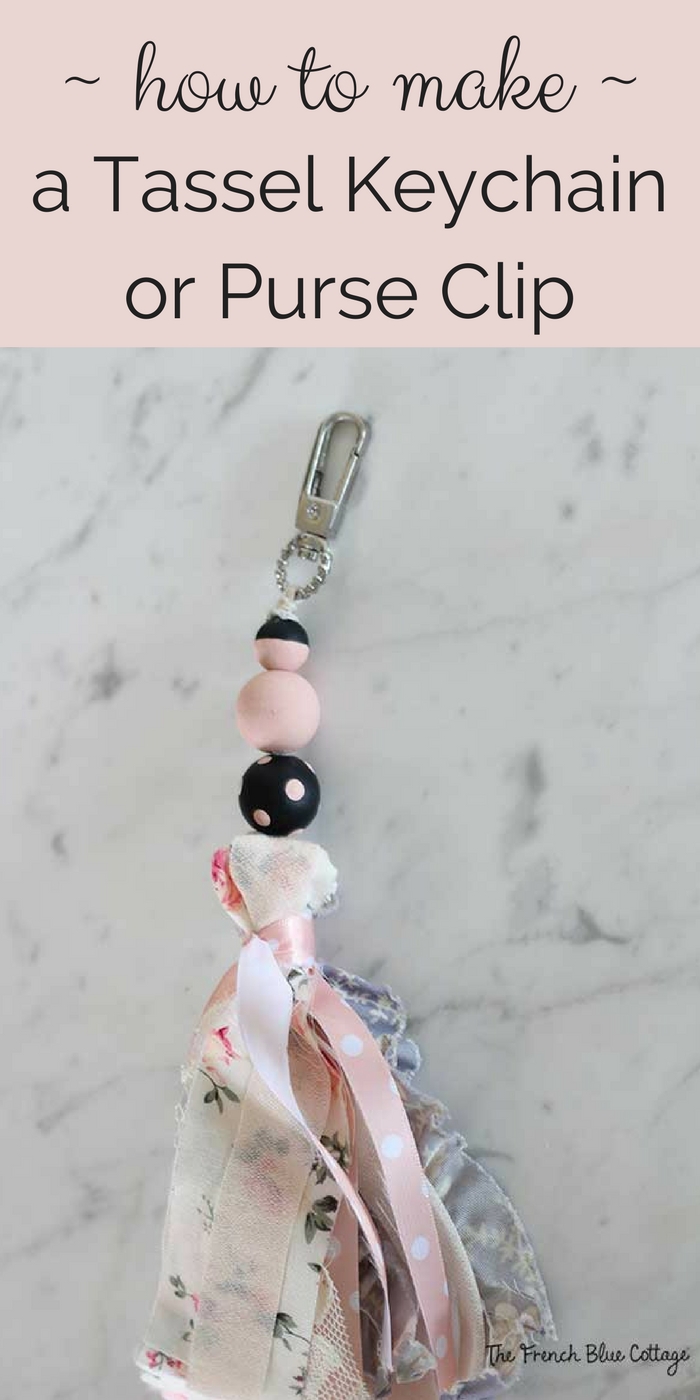
DIY Tassel and Wood Bead Keychain
My oldest baby turned 16 this week. Whaaat! How did that happen?
My little boy is legally old enough to drive a car!
And on a side note, have you reached the age yet when you see a kid pull up in the parking lot and hop out of the car and the first thing you think is, “Where is your mother? Surely you did not just drive that car by yourself”?
I remember being 16 and getting the keys to the car. I felt so grown up and those keys meant a little taste of freedom.
Nowadays those keys feel a bit more like “I need to pick up milk and make sure to get the kid to guitar lessons on time”?
Anyways, I looked down at my own keys the other day and had three thoughts:
1. I’ve had the same keychain for about a decade.
2. It’s starting to look a bit worse for wear due to the fact that I’ve probably dropped it 50 times in the past decade.
and
3. “Wouldn’t it be fun to make my own keychain?!”
I actually had so much fun designing this one, that I ended up making three new keychains! But that would make this post super long, so I’m just going to show one of them for now.
And I don’t know what’s going on, but I seem to be in a girly, shabby chic mood recently (it started with that floral Valentine’s table) and this keychain show it:)
Without further ado, here’s the tutorial (some affiliate links used; see my full disclosure here)…
![]() strips of fabric or ribbon (varying widths in your choice)
strips of fabric or ribbon (varying widths in your choice)
wood beads (I used 3/4 inch and 1/2 inch) (both of them had a 1/8 inch hole)
tape
craft paint
super glue
swivel clasp (also found in the jewelry section at the craft store)
the tassel part of the keychain:
First, cut some strips of fabric or ribbon for the tassel part of the keychain. Mine ended up being about 12 inches long to start with. I did not do anything to the the edges and the strips will probably eventually get a few loose strings, but I don’t think that will bother me. If that would drive you crazy, then I’d suggest using some fray check on the edges and ends.
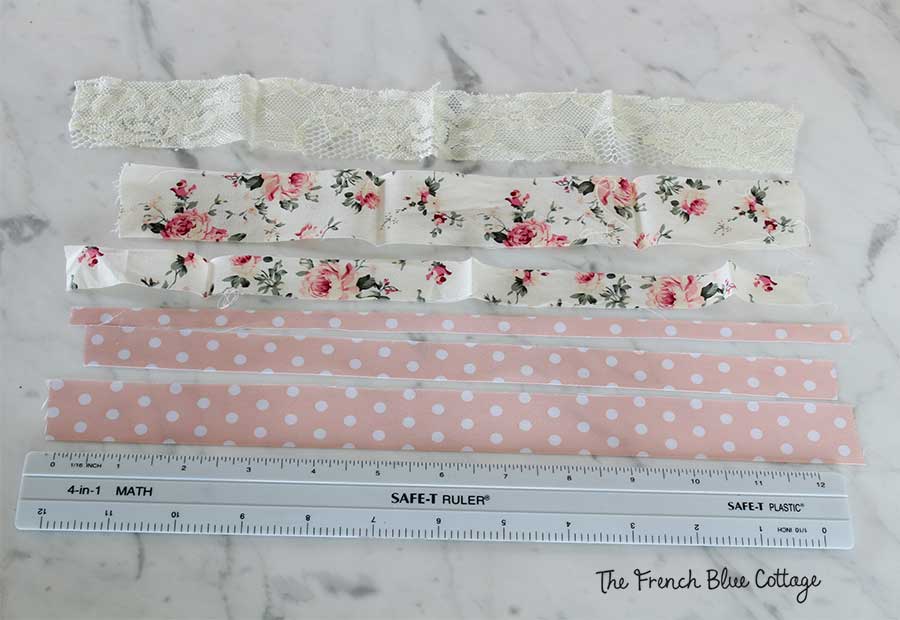
Here’s the second group of ribbon strips (all of mine came from Hobby Lobby)….
The next step is to stack the strips of fabric/ribbons and then lay a length of hemp cord underneath and parallel to the ribbons. I think this hemp string was about 24 inches long, which was much too long, but you can always cut it…
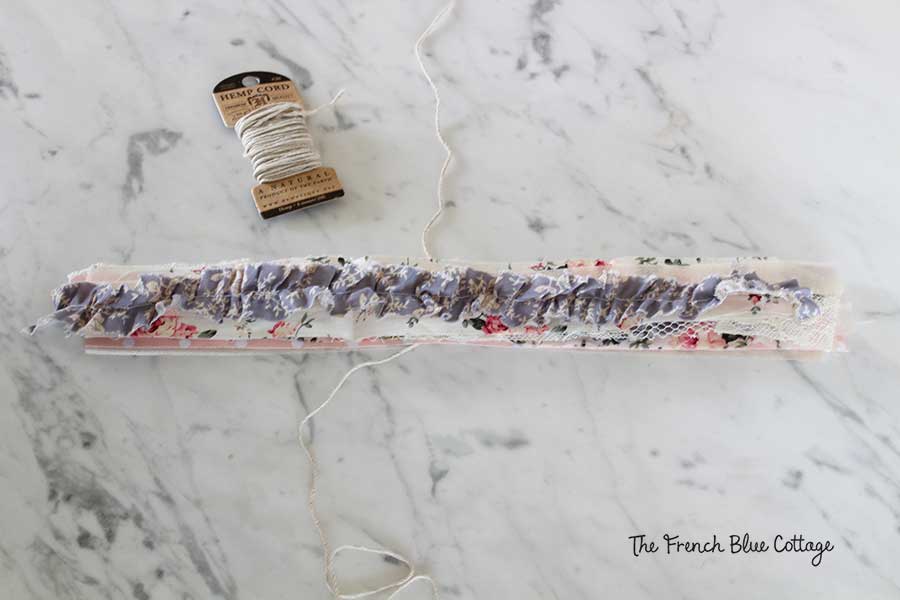
Tie the hemp cord into a knot…
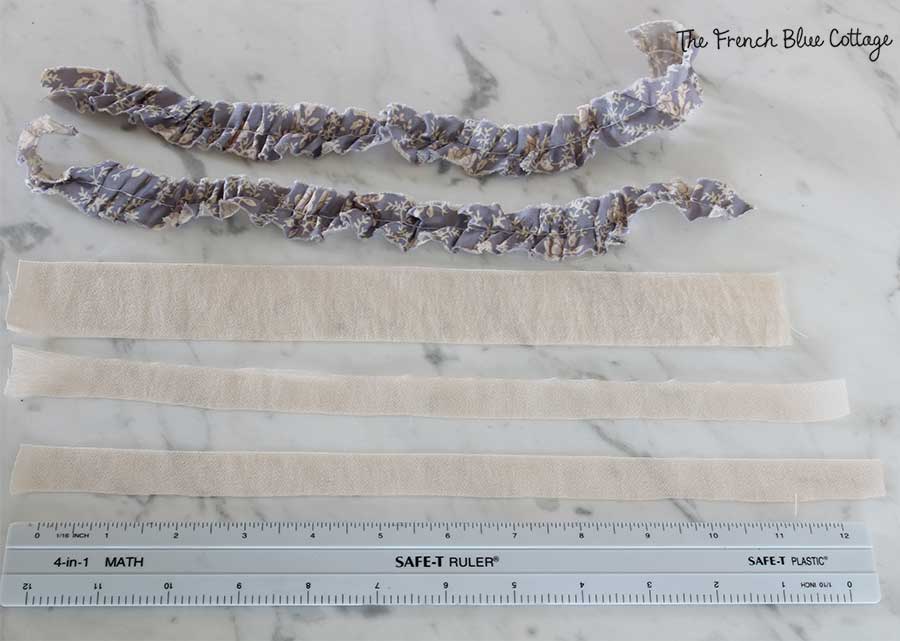
 Fold the ribbons in half and place another piece of ribbon parallel to the fold about an inch down…
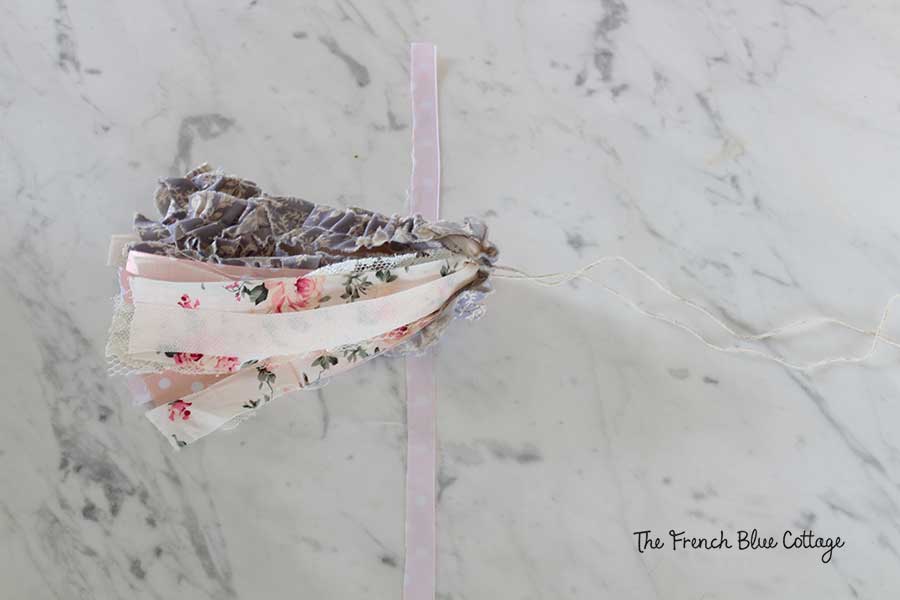
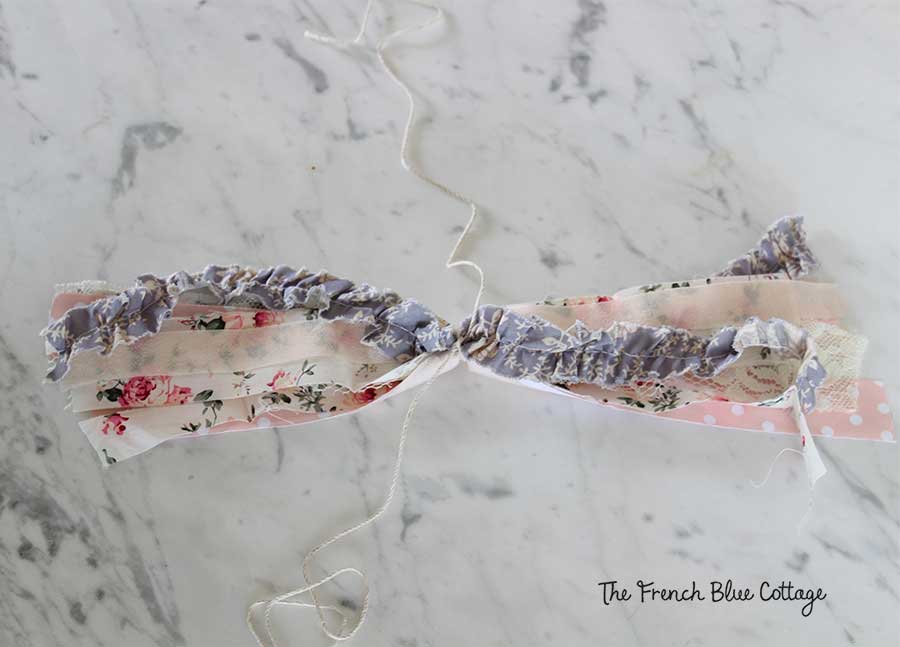
Tie this strip into a knot and then let the ribbon just become part of the tassel…
the wood bead part of the keychain:
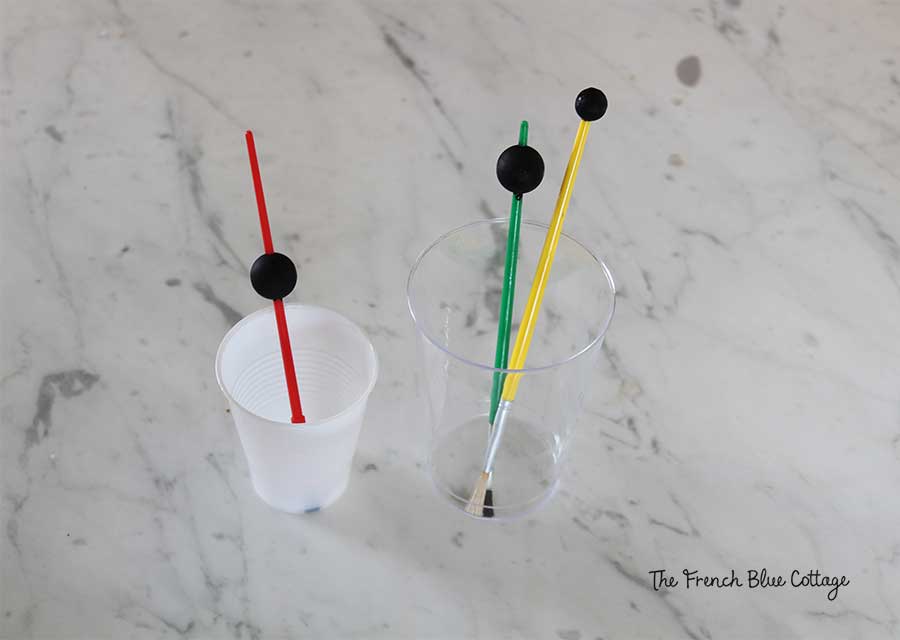
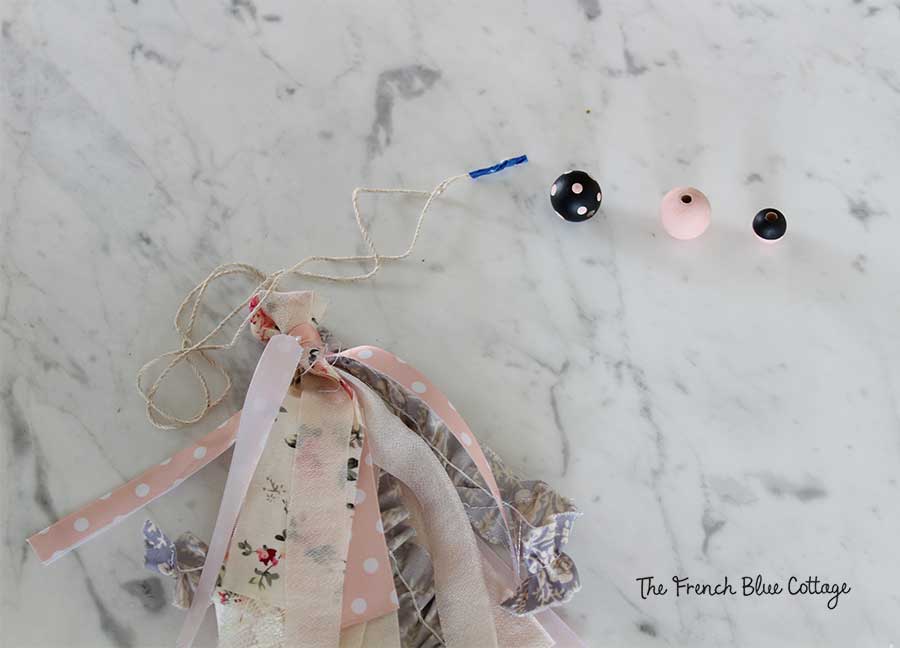
For the next part, I painted wood beads with black craft paint. I placed them on the ends of some cheap paintbrushes to make it easier to paint them and to help them dry evenly…
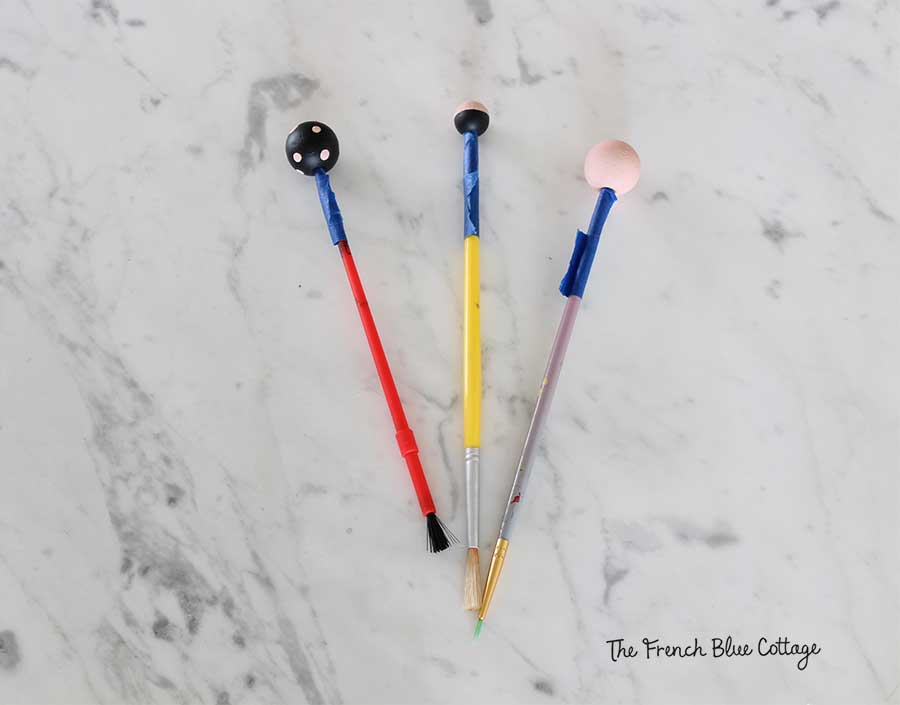
I changed my mind (a girl can do that from time to time, right?) and painted one of the black beads pale pink. Then I painted one of them half pink and painted polka dots on the other, let them dry, and sprayed them with matte sealer. The tape you see below was just to keep the paintbrushes from getting sticky from the spray sealer…
Next, place a piece of tape onto the two ends of the hemp cord and thread them through the beads…
Remove the tape and tie the hemp cord to the swivel clasp using whatever knot you are familiar with.
I used this tutorial to learn to tie a couple of snake knots…
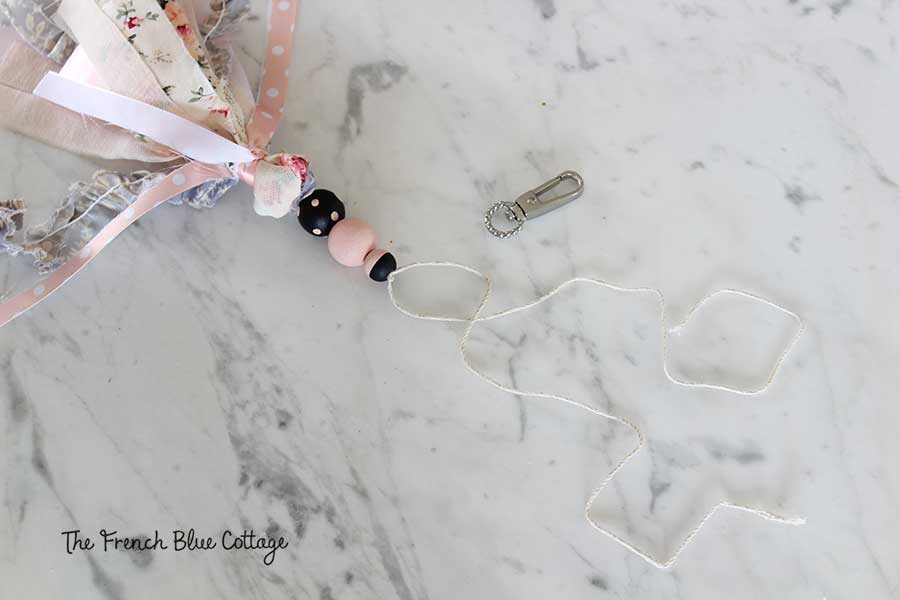
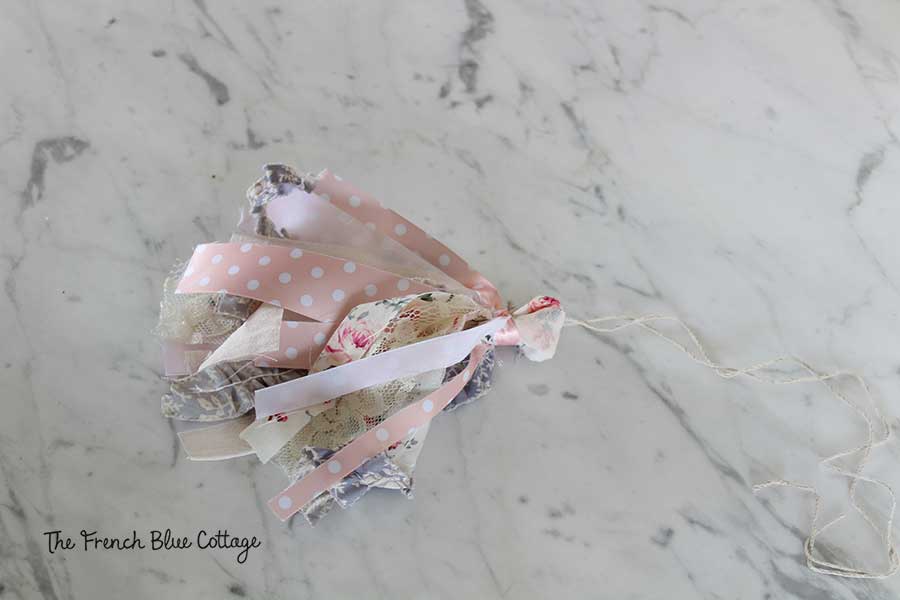
I added a tiny dab of super glue to the ends of the knot just to be sure it was nice and secure. And I also cut just a bit of the length off of the strips to make my tassel a tad bit shorter…
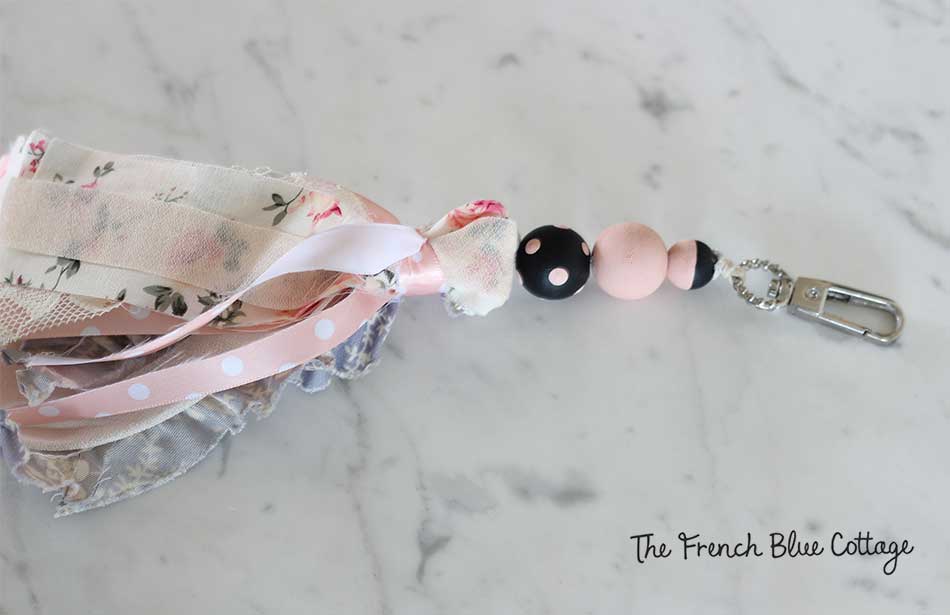
And there you have it. A fun, DIY keychain.
You can make this in whatever colors and whatever length you like.
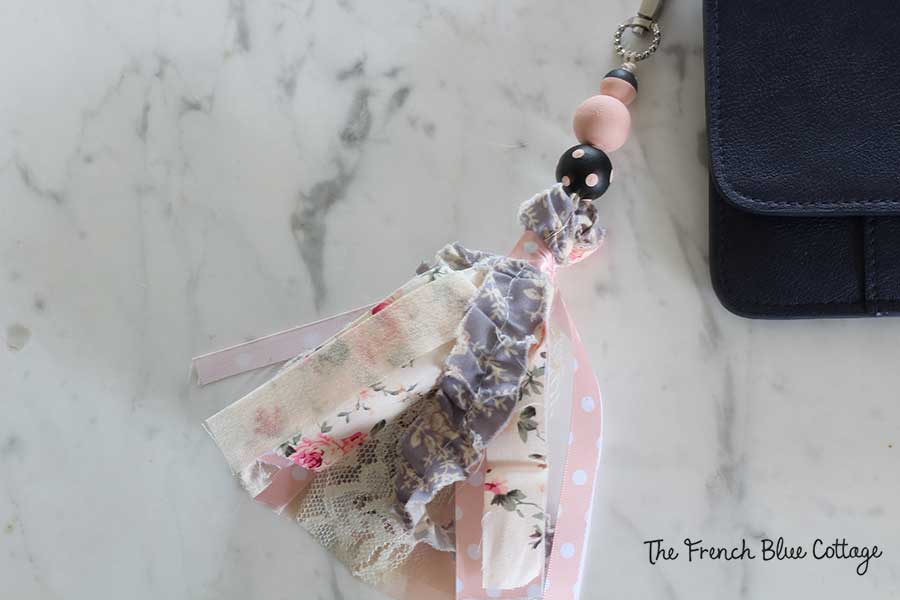
And if you don’t want to use it as a keychain, how about using it as a really cute purse tassel?
My husband took one look at this keychain and said, “Well, I for sure won’t be taking your set of keys when I drive your car.” Ha ha! There’s definitely no mistaking them now:)
And as a bonus, maybe it will keep me from losing them in the bottom of my purse:)


It’s super cute!!
Thanks, Peg!
Love it Carrie. Thanks for sharing.
Thank you! I’m so glad you liked it:)
I’m gonna try this…to cute!
Thanks, Debbie! You should definitely give it a try! I love clipping mine on my different handbags for a new look. ?