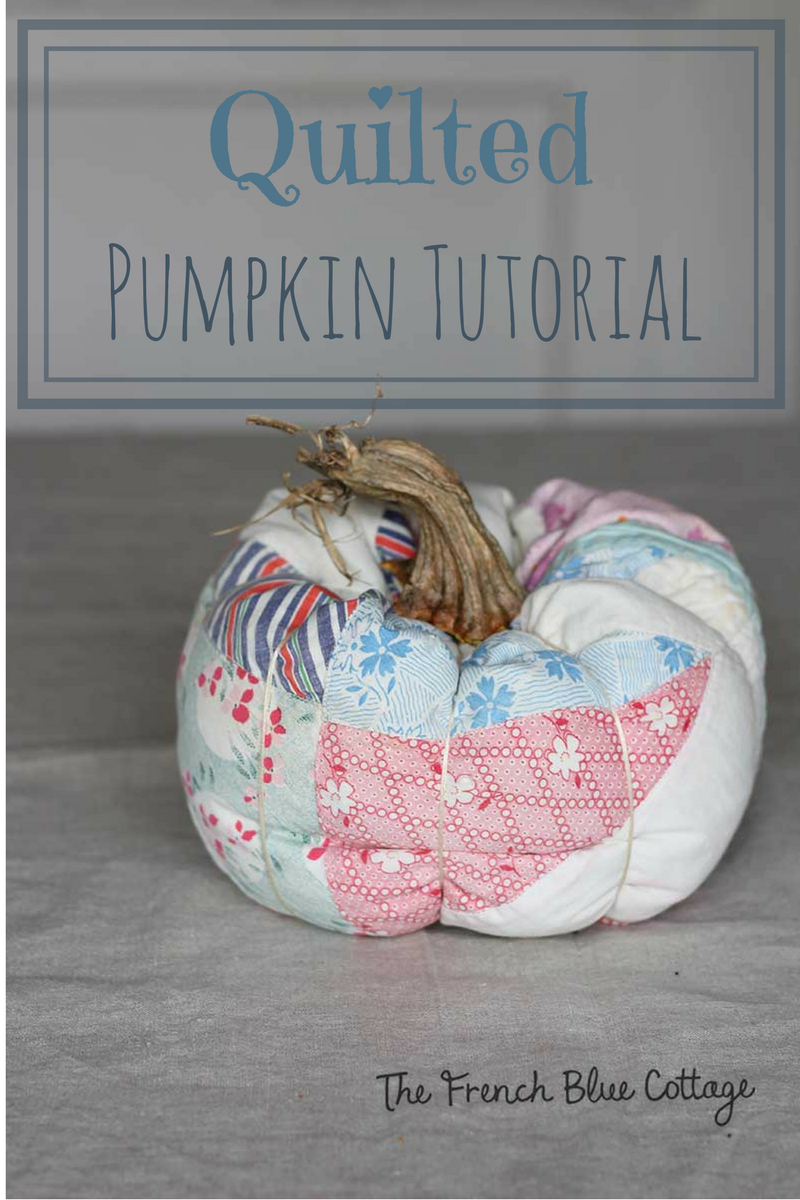
Quilted Pumpkin Tutorial Plus a Bonus
Are you “pumpkin-ed” out? Or can you stand one (or two) more pumpkin tutorials?
This quilted pumpkin tutorial is easy and makes a really unique fall decoration.
Also, a reader asked me how to make the velvet pumpkin that I used in one of my fall décor tutorials. So, I added that tutorial to the end of this one. Get ready for lots of pictures in this post!
And stay tuned to the end for some really great pumpkin-making tips I learned along the way.
*Disclosure: Some of the links below are affiliate links, meaning, at no extra cost to you, I will earn a commission if you click through and make a purchase.
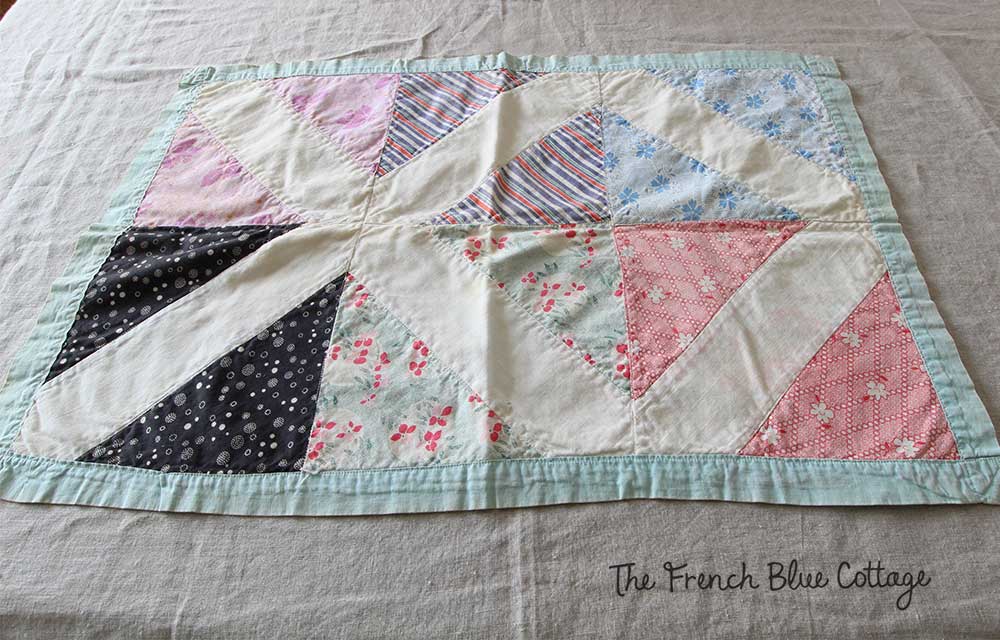
I saw a pumpkin made out of an old quilt at an outdoor antique and craft fair and wanted to try it out for myself. I hunted around for a small quilt or a “cutter” quilt that I wouldn’t mind experimenting on and finally found a small piece at a local antique store. This one was 16″ x 24″, but I think 10″ x 20″ would be about ideal. It’s not really my colors, but at $6.99, it was a perfect “guinea pig”.
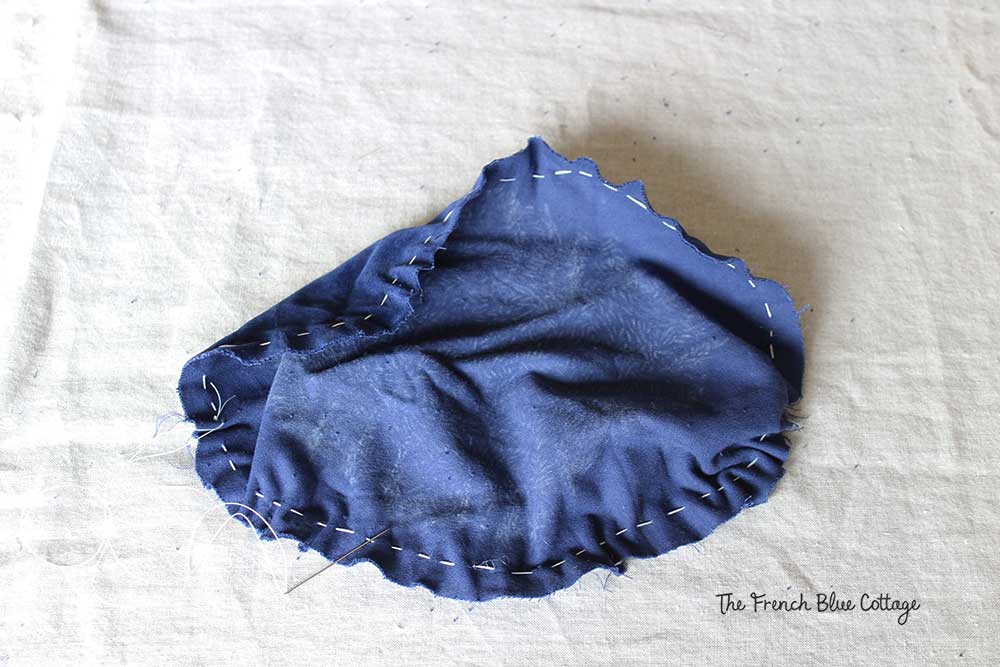
Step 1:
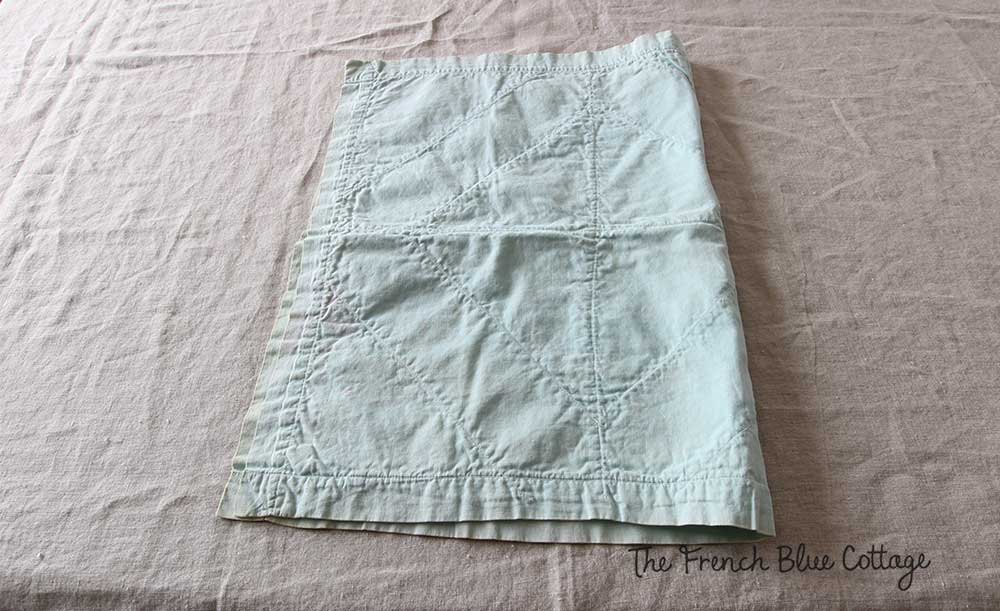
Fold the quilt in half (width-wise) with right sides together. Use a sewing machine or hand stitch the two open sides that you just folded, essentially making a long tube.
Step 2:
Use a needle and thread to sew a wide basting stitch in a circle around one edge of the quilt “tube”. I used a double length of embroidery thread.

Step 3:
Pull the thread to gather the edges tightly together and then run a few stitches back and forth to be sure it’s fully closed.

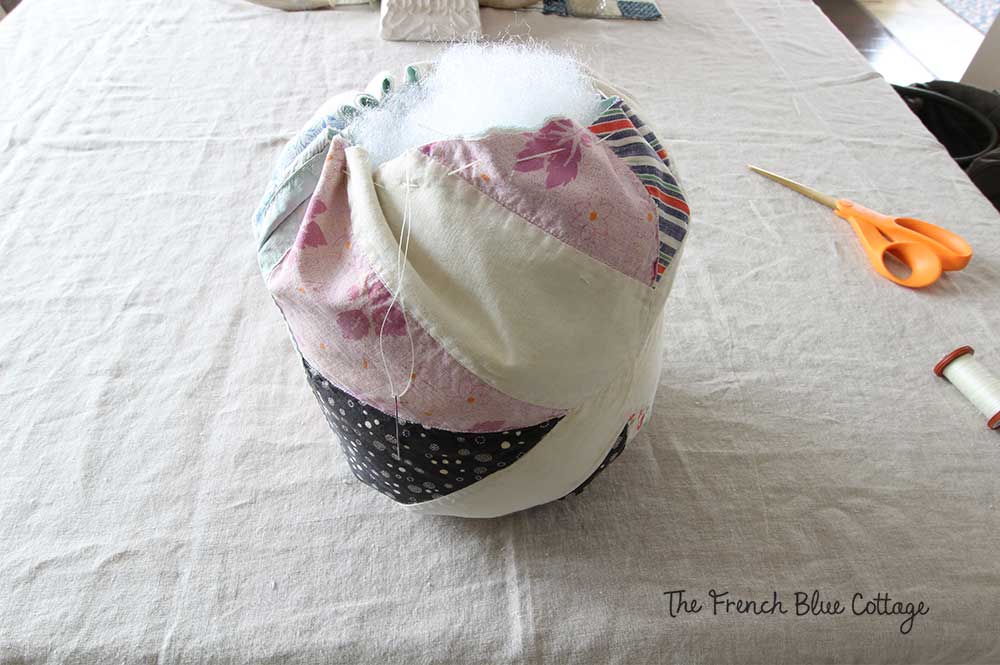
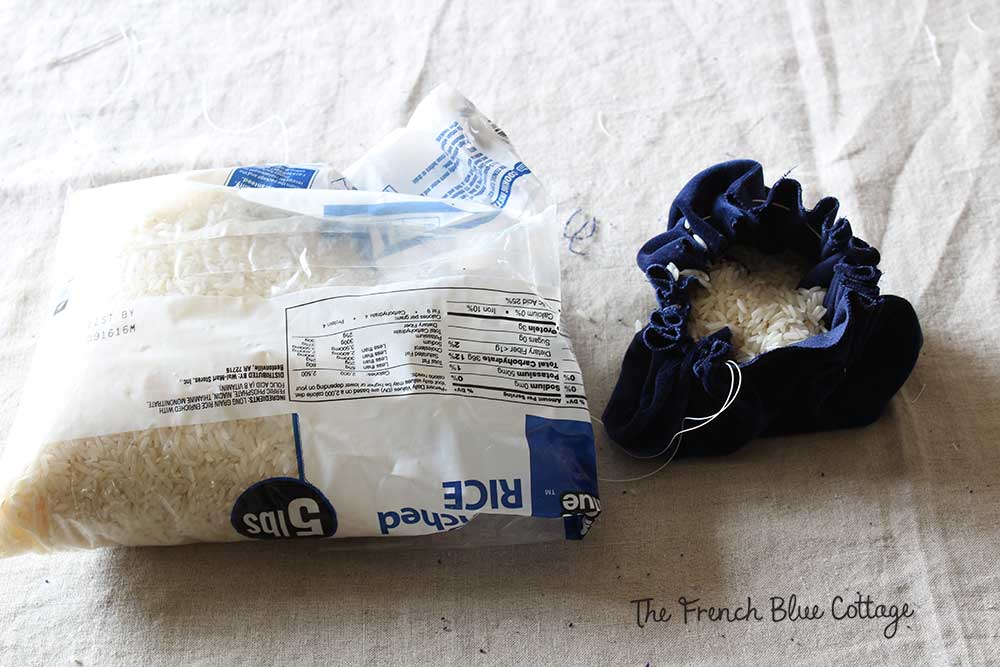
Step 4:
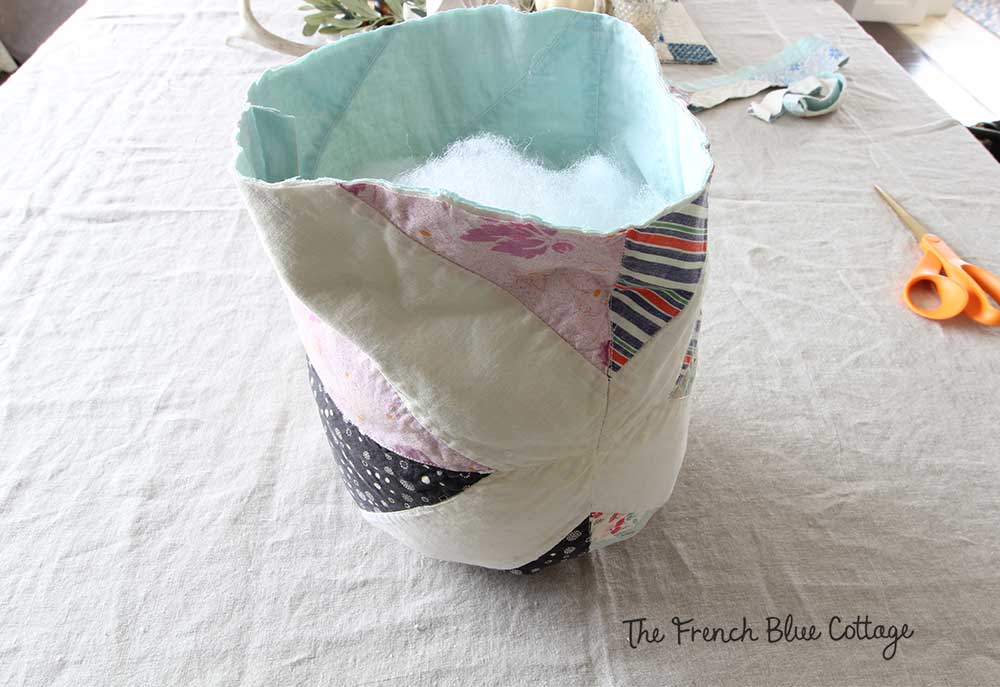
Turn right side out and stuff with fiber fill. My quilted pumpkin was definitely looking too tall, so I cut a few inches off of the top before I stuffed in the fiber fill.
Step 5:
Run another wide basting stitch around the top, gather, and stitch closed.

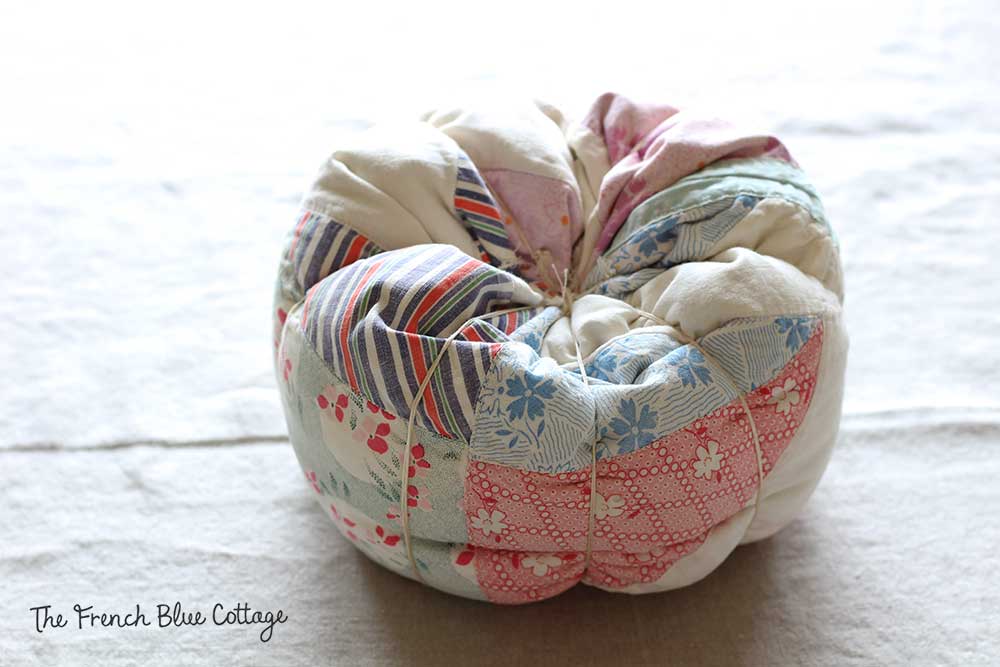
Step 6:
Take a doll needle threaded with a double length of embroidery floss and poke the needle into the center of the bottom of the pumpkin and push through to the top. Use a long enough needle that won’t get lost inside! Take the needle around the outside of the pumpkin and go back up through the bottom of it again. Depending on how long you cut your embroidery floss, you might be able to go around more than once. Squeeze the pumpkin to compress it and tie a tight knot at the top. I triple knotted mine. Keep doing this until you have as many pumpkin “ridges” as you like.
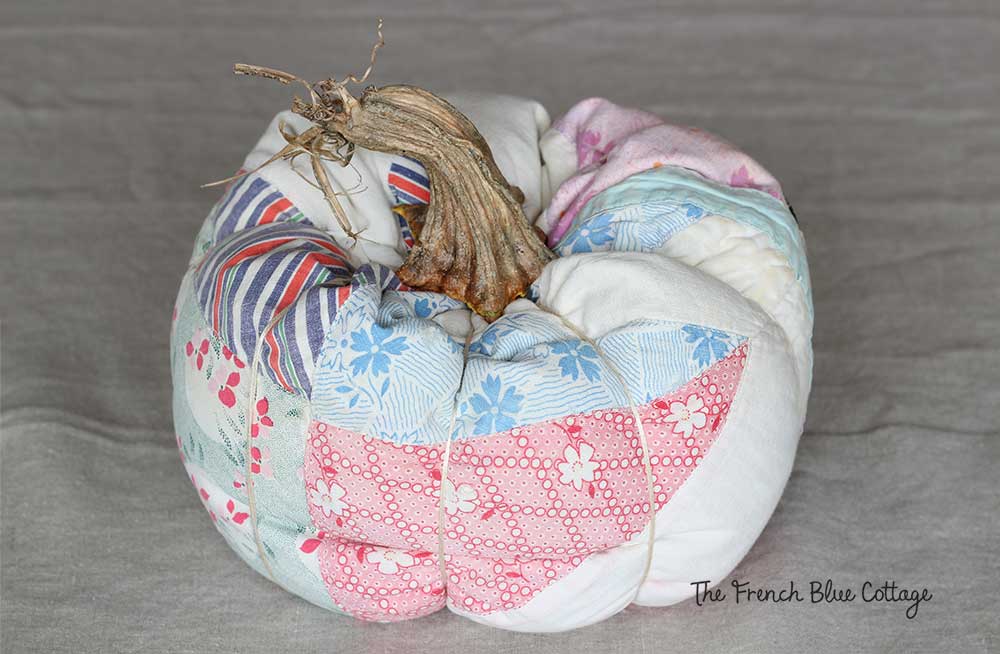
Step 7:
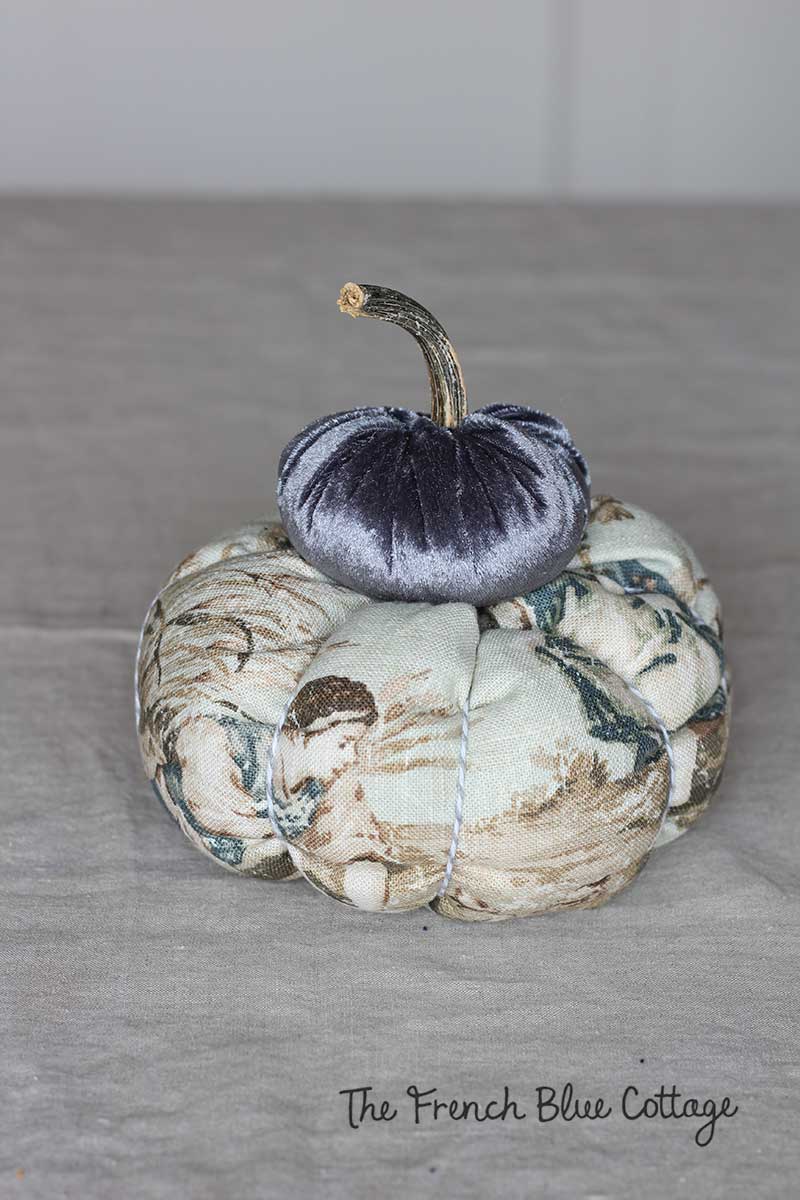
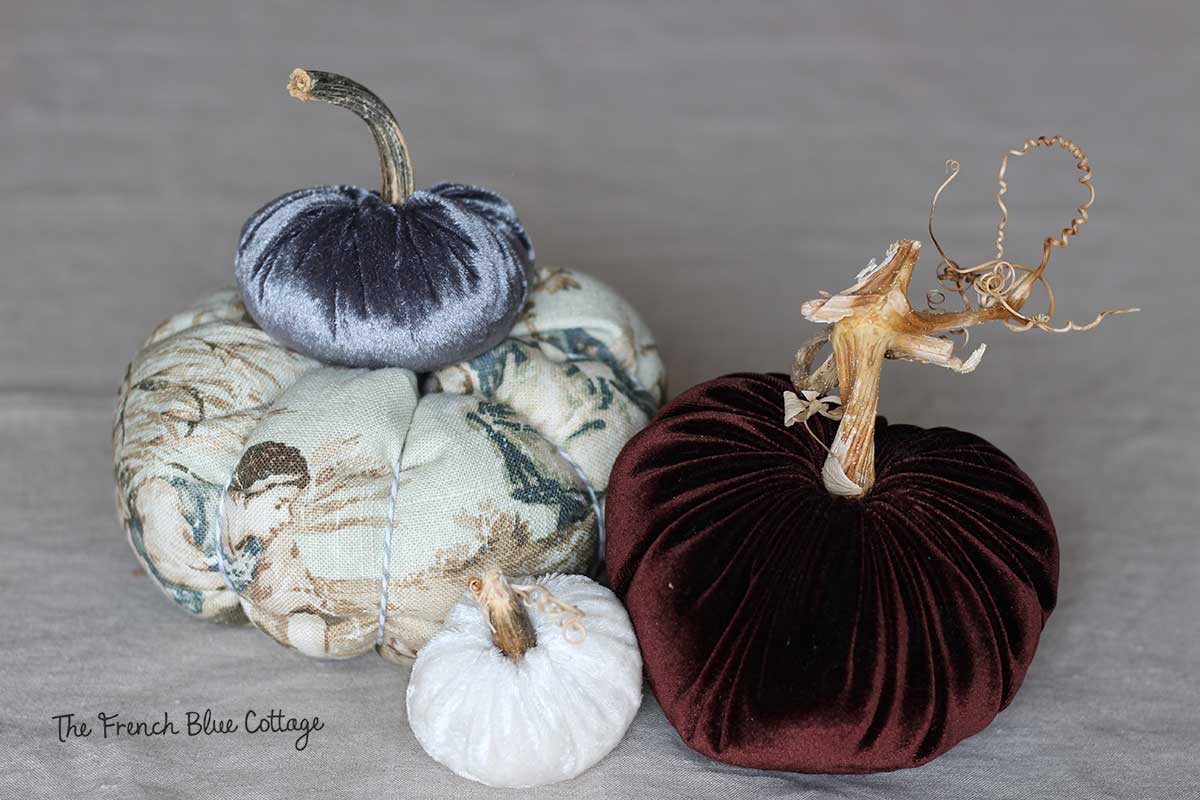
Add a real (dried) pumpkin stem to the top. You can glue the stem down or follow my bonus tip at the bottom of the post, instead…
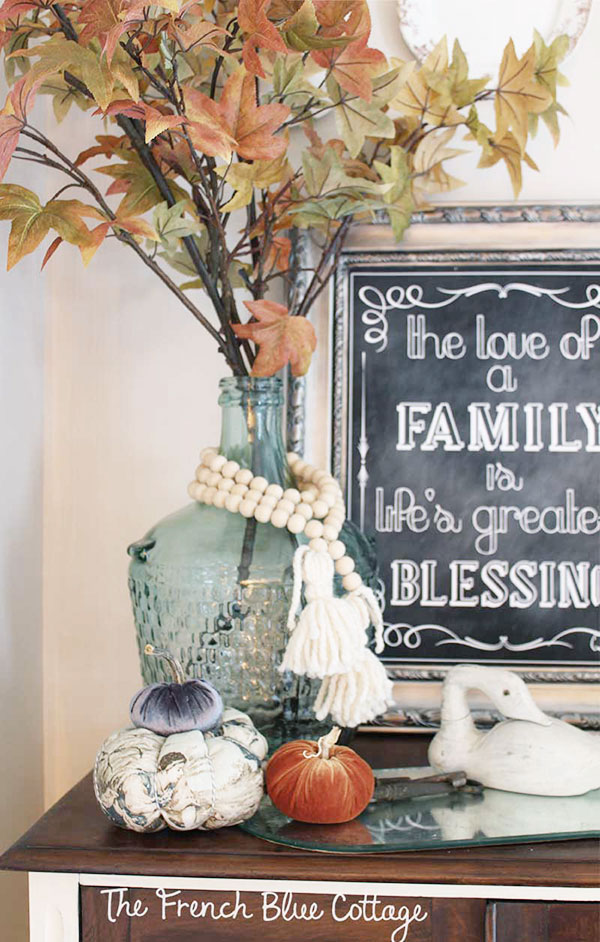
I like the way this quilted pumpkin turned out and I’d definitely try this again using a quilt piece in colors that are more my style.
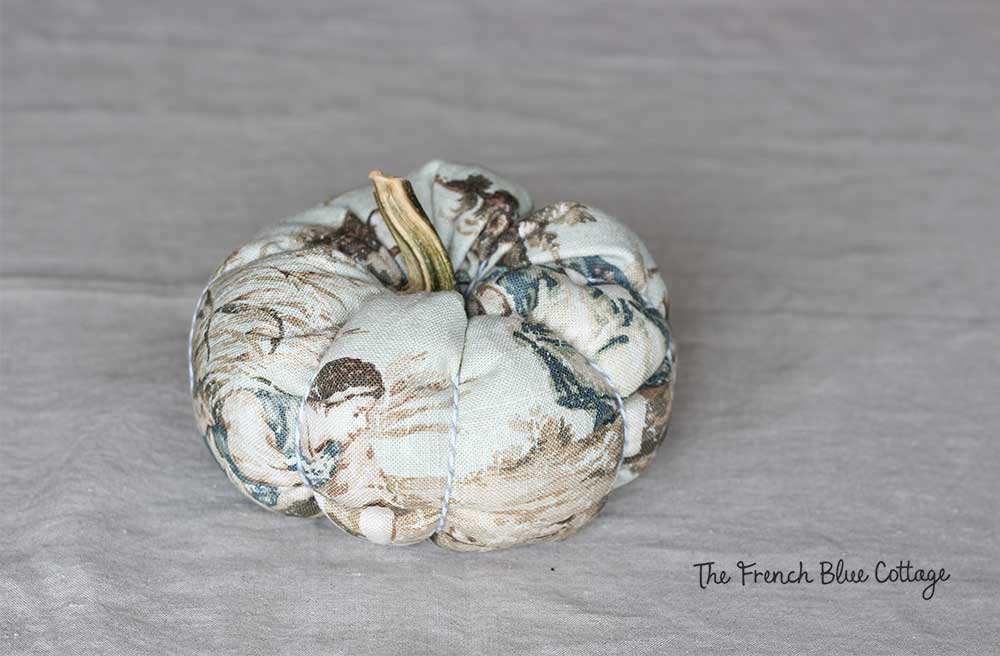
Here’s another one I made using a toile fabric and baker’s twine….
Ok, now on to the velvet tutorial:
First, cut a circle or oval shape out of velvet. Unless you’re really into perfection, I wouldn’t bother with measuring:) Just cut out a rough shape. Run a basting stitch with embroidery thread around the edge. Use a thread that matches your fabric; I used white here just so you could see it in the photos.
Then, gather the edges a bit and fill about 1/2 – 2/3 with rice and then stuff the rest with fiberfill.
Next, gather the edges tightly and tie a knot or two. Use your finger to poke the raw edges under. You could also sew the edges down if you prefer, but I never do.
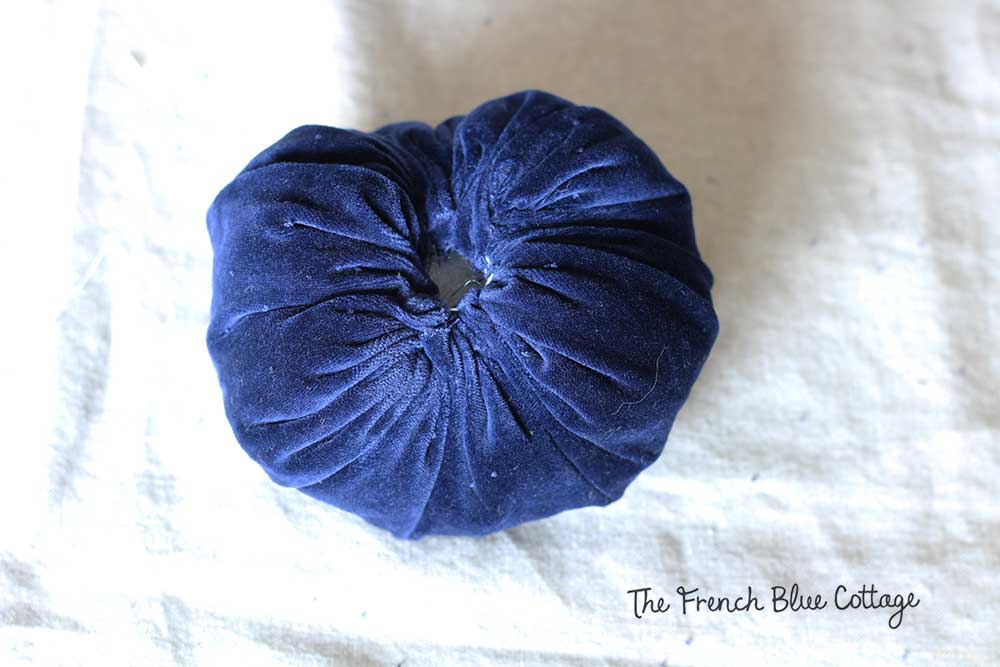
Finally, pop in a real pumpkin stem…
(really helpful) Bonus tips!
- Definitely use a doll needle to make the “ridges” in the fabric or quilted pumpkin tutorial.
- A thimble also comes in handy.
- For the quilted or fabric tutorials, use a rectangle that is about half as wide as it is long (i.e. 10 x 20, or 7 x 14, etc.)
- When you’re making the ridges, it is really nice to have a helper; someone who can hold their finger on the thread while you’re knotting it.
- You can dry the pumpkin stems naturally, but if you don’t want to wait (who wants to wait?), there’s a faster way. Just cut the stems off, scrape off most of the pumpkin from them, and pop them in the oven for a few hours on 150 degrees. I took mine out part-way through and scraped off a bit more of the pumpkin and put them back in. They basically get dehydrated and will feel light and hollow when they are done.
- Also, you can glue the stems on -or- just poke them in and let them just sit there. I like to do this sometimes so that I can take the stem out and stack the pumpkins on top of each other.
- For the velvet pumpkins, if you stitch close together while basting, your pumpkins will have more tightly gathered ridges.
- Oval shaped fabric makes more oblong, flatter pumpkins that sometimes have a few humps, while true circles make really round pumpkins. I like to have some of each.
- You can use plastic filler pellets instead of rice, but the rice is cheaper.
- You can also use fiberfill only and forget the rice, but the rice pumpkins really have a delicious weighty feel. I don’t know how else to describe them because they feel good like a stress ball when you squish them:)
- If you think that you might want to make some pumpkins next year, save the stems from this year, clean them off, and just stick them in with your decorations in the attic. They’ll dehydrate naturally and be ready for you to craft with next fall. And always be on the lookout for cool, curlicue stems!
Whew! That was a long one. Kudos to you if you hung with me to the end:)
I hope you’ll try to make some of these for yourself or to give as a gift. Or just Pin it for later if you want to try it next year!


Amazing! I think I can do this! Thanks!