31 Days of French-Inspired Design Day 21: Faux Grain Sack Tutorial
I’m going to do something a little different in my 31 Day series today and share an easy faux grain sack tutorial.
Stay with me to the end of the tutorial for a funny side story about these chairs. Well, it’s funny now. When it happened, not so much.
Materials:
painter’s drop cloth, painter’s tape, small bottle of acrylic paint in the color of your choice, paint or stencil brush, textile medium (found in the acrylic paint section at the craft store), optional matching thread
1. Go to the hardware store and buy a cotton painter’s drop cloth.
2. Wash and dry the drop cloth. Some people bleach their drop cloths, but I liked the natural color.
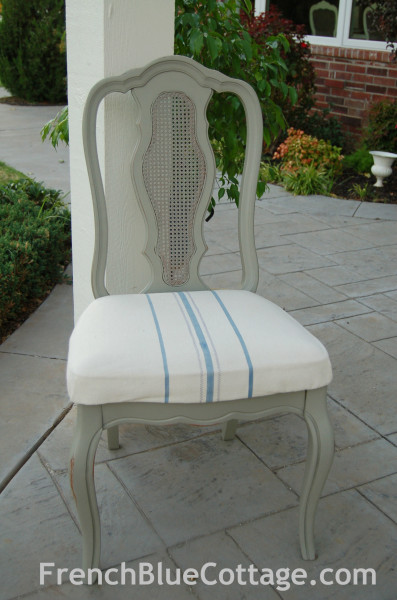
3. Measure the size of fabric you need for your project and cut it out. I made chair pad covers, so I removed one of the pads and traced around it, leaving some extra fabric for stapling under the edges.
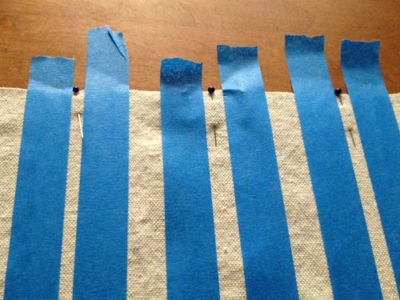
4. Tape off your faux grain sack stripes. Make sure your tape is burnished down along the edges so the paint doesn’t seep through. I chose to tape off three stripes, with the one in the center a little thicker. I did not measure the spacing and just “eyeballed” it because I wasn’t aiming for perfect. Remember that wabi-sabi post? 🙂
*Before I started painting, I put straight pins in the areas where I wanted the paint to go so that I didn’t accidentally paint the wrong part.
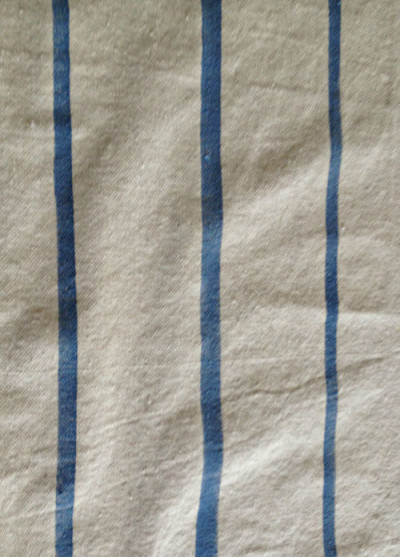
5. Mix textile medium with acrylic paint according to the directions. Paint it onto your fabric in between the tape that you burnished down. I used a stencil brush and dabbed it on with a kind of dry brush technique – dip the stencil brush into the paint, then pat it onto a folded up paper towel to blot the excess off, then pat it onto your fabric.
6. Heat set the paint according to the directions on the textile medium. The drop cloth would need to be ironed anyway.
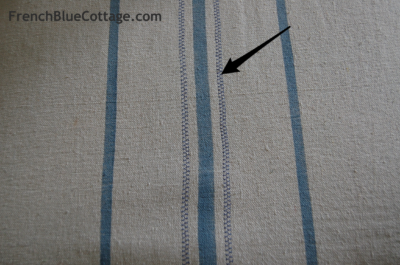
7. Optional – load your sewing machine with a thread that is about the same color as the paint you chose and run a line of zig zag or other fancy stitch along side of the center stripe.
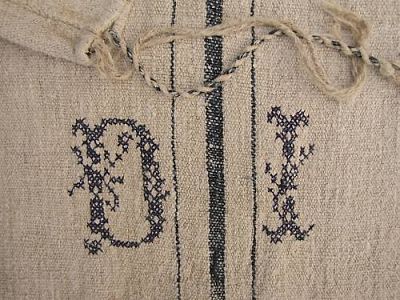
8. Optional – if you have a machine that will monogram, you could add your initials for extra French flair!
You can use your faux grain sack for chair covers, pillows, cafe curtains, table runners, placemats, etc.
I had just finished the entire set of these chairs…painting them, making the faux grain sack, and covering the chair pads. The chairs were all lined up in the sunroom while I worked on the table. My youngest son came in and said, “Mama, I need to show you something.” He looked so solemn, I knew something was wrong. He took me by the hand and led me to the sunroom where I found this….
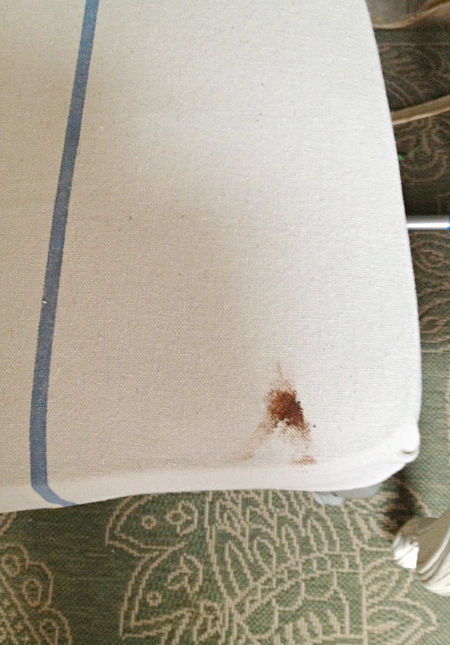
A big spot of Oklahoma red mud on my newly finished chair!
He had played outside with the dog and then put his foot on the chair to untie his shoe. He was so apologetic that I just couldn’t get that mad at him. Luckily, most of the stain did come out and I actually smile now when I see that little remaining spot. Gotta love little boys!
I hope you enjoyed this French-inspired tutorial.
See you tomorrow!




Very cool!! They turned out great!. Funny story!!
Thanks for the tutorial : ) sweet little boy , I know you’re proud he ‘fessed up but I can feel your spirit sink after all that work.
Oh, my heart did sink for a moment! That red dirt is a real pain to get out!
Great tutorial. Thanks for sharing. Love the idea of using the stitch down the middle on both sides of the painted line. I am going to have to try that.
Thanks for visiting and taking the time to comment:) These chairs covers have held up quite well so far.
Good tutorial & what a great idea with zigzag stitching on each side of the middle stripe! (now if my cranky machine will just do that) Would Scotchguard help with the staining, I wonder? Never tried it on drop cloth fabric.